How to Create a Customer Database in Microsoft Excel
创建一个客户数据库在Microsoft Excelfairly straightforward when you use a template. Gather the data you want to include, and then download a customer database template. We’ll walk you through the steps to complete it below.
Download Microsoft Excel Customer Database Spreadsheet Template
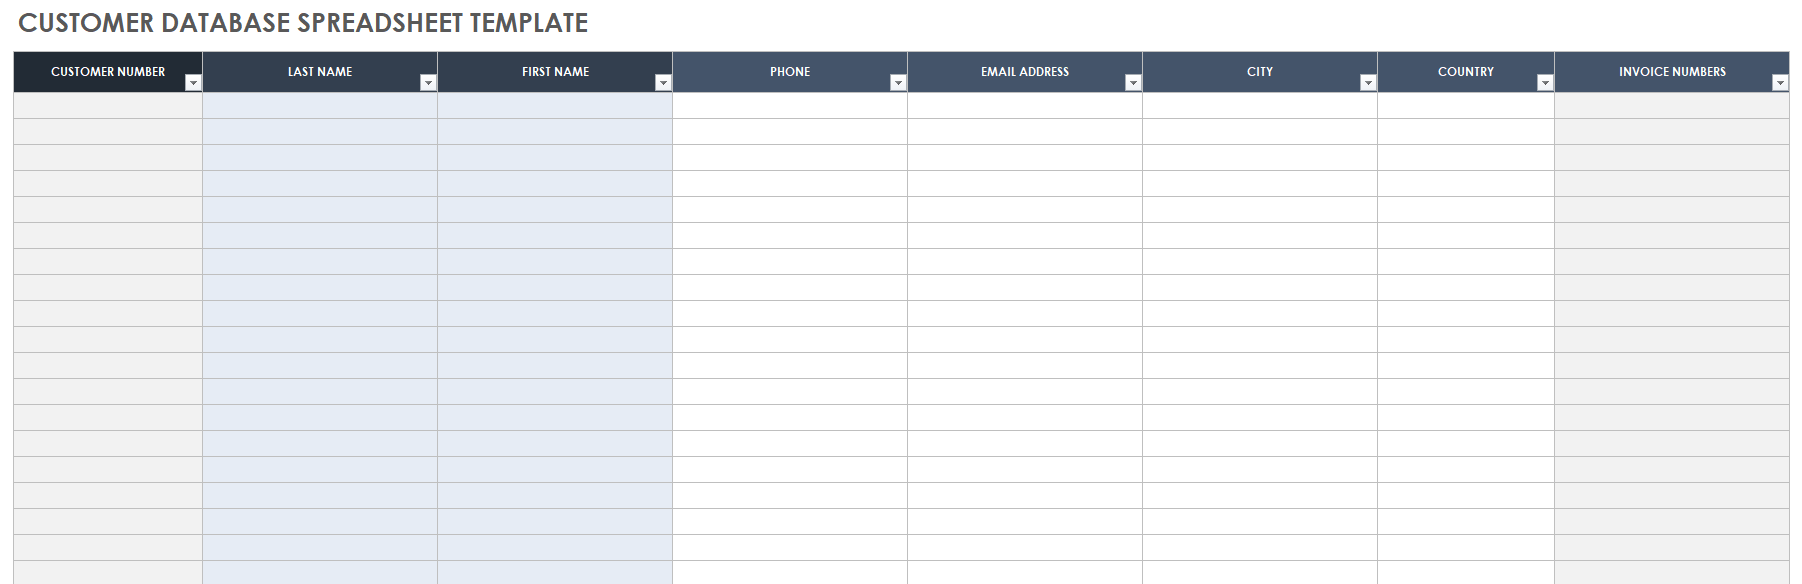
Download Customer Database Spreadsheet Template — Microsoft Excel
This template is prefilled with some common customer database fields that you can change easily to suit your needs. It is also pre-formatted to simplify sorting and filtering your results. Check out our collection ofExcel customer database templatesfor more options, and for more examples of personal data list templates, see our list ofcontact list templatesandclient list templates.
Anatomy of a Customer Database
Maintaining an updated customer database can benefitcustomer relationship management(CRM) by ensuring that client contact and purchasing details are current. For more examples of how to use templates to assist in CRM, check out our list offree CRM templates.
First, let’s define some terminology. Adatabaseis a set of data organized into rows and columns. This formatting makes it easier to read and reference the data.
Database entries are divided into records (or rows), and fields (or columns). Arecordis one row of a database that shows information about a single subject. In this example, a record is a single customer and their corresponding information.
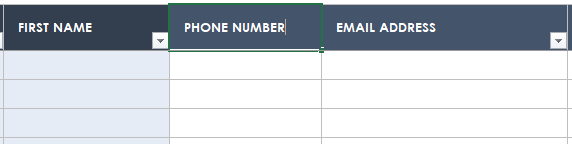
Afieldis one column of a database that contains all of the information in a single category; for example, you would enter phone numbers or names in a field.
Follow the steps below to easily complete a database template, with customizable records and fields.
1. Prepare the Customer Database
- When you download the customer database template above, it will automatically open in Microsoft Excel.
Pro Tip:ClickEnable Editingat the top of the spreadsheet. This step will allow you to make changes to the downloaded template.
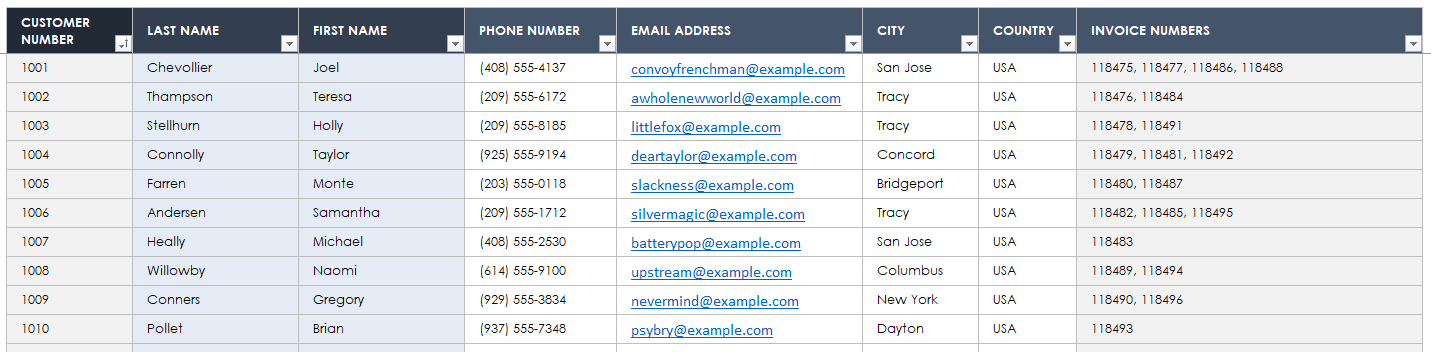
- Decide the type of customer information you want to include in the database. In this example, we are using first and last names, phone numbers, customer identification numbers, city, country, and invoice numbers. You can name every field and enter any type of data in this fully customizable template.
- Ensure the predetermined fields along the top row of the database template match the details you would like to include. To change a field, click the desired cell and type your new entry.


2. Enter Customer Information
- To enter a customer record, click cell4Band type the customer number. Click theTabkey on the keyboard and type the last name in cell4C.
- Click theTabkey on the keyboard to navigate the spreadsheet and enter data in each record’s field.
- Go record by record and enter the customer information you have on file. If you do not have all of the information you need, check yourclient info forms.
Pro Tip:Keep the format for each field consistent. For example, if one phone number uses parentheses, all of them should use parentheses. Enter countries as full names or acronyms consistently.

3.Sort the Data
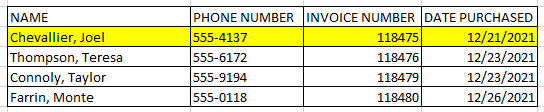
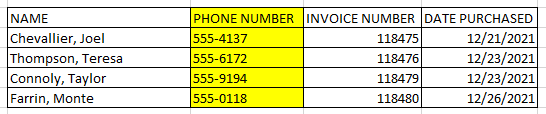
- You can sort records alphabetically. Click the drop-down arrow in theLast Namecell (C3).
- ClickSort A to Z. Click theOKbutton. Note: Your version of Excel might have options forAscendingandDescending.If it is a numerical field, you can sort your records numerically by clicking the drop-down arrow andSort Smallest to LargestorSort Largest to Smallest. Note: Your version of Excel might have options forAscendingandDescending.
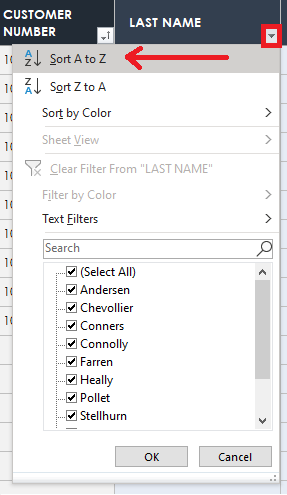 Pro Tip:If there is no drop-down arrow, click theDataheading, thenFilter, and the arrows will appear on the main title fields in the template.
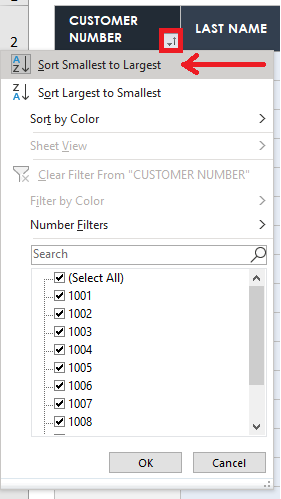


Microsoft Excel Customer Database Example Template
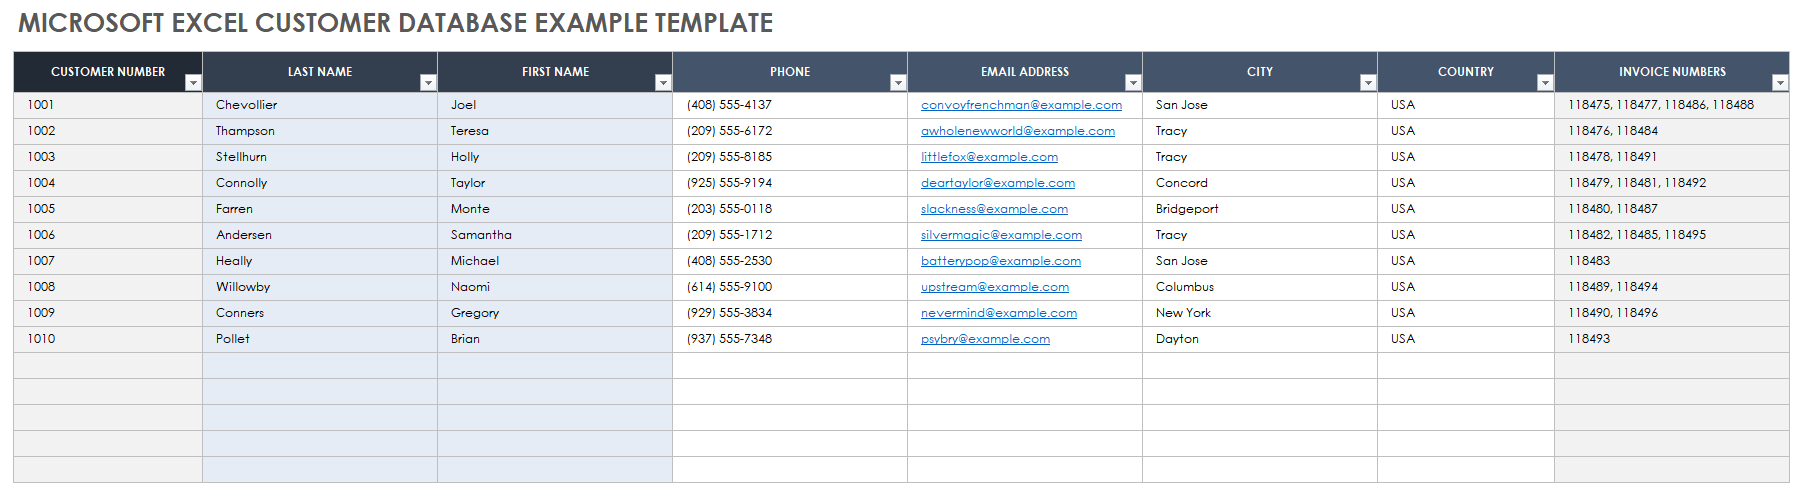
Download Customer Database Example Template — Microsoft Excel
This template is an example of a customer database for use in Microsoft Excel. The template has been prefilled with sample customer data, but each cell and field is fully customizable. Change the field headings and fill in customer data to create a database that is organized and easily searchable.
How to Format a Customer Database in Microsoft Excel
There are many formatting options to customize the look of a customer database in Excel. Learn to change colors and fonts, add logos, add or change borders, and more.
Format Cells in Excel
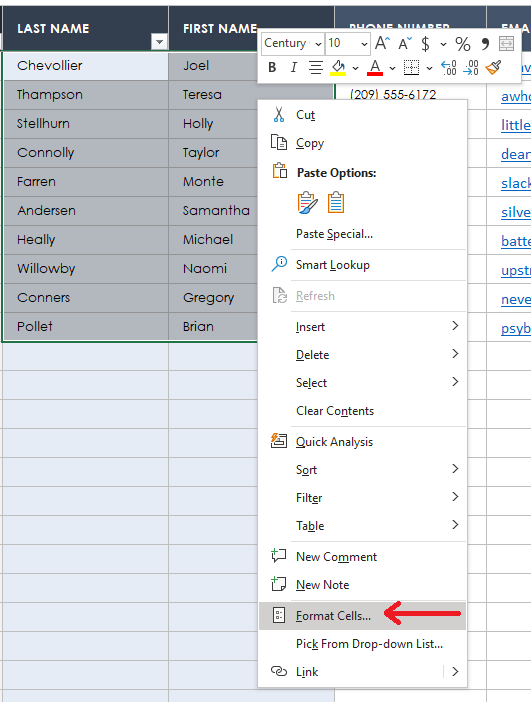
- To format a single cell, right-click the desired cell. ClickFormat Cells…Cycle through the menu optionsNumber, Alignment, Font, Border, Fill, andProtectionto change number styles, fonts and colors, add or change borders, change the alignment, and protect these cells.
- To format a group of cells, hold theShiftkey on your keyboard and click the top and the bottom cells of the desired range. Release theShiftkey. Right-click anywhere inside the highlighted selection. ClickFormat Cellsin the drop-down menu.

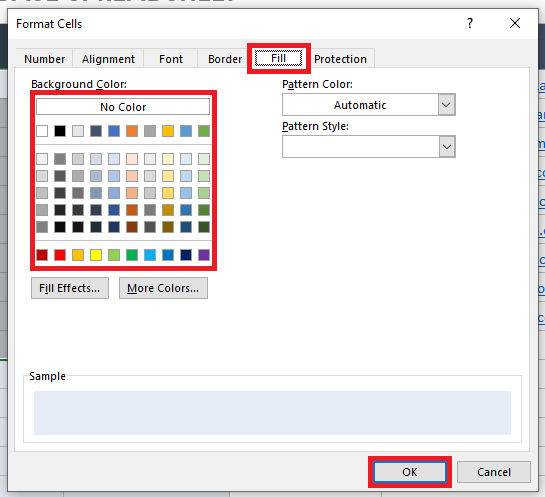
Change the Background Color of a Cell
- Click the cell you want to change. Right-click and clickFormat Cells...
- Click theFilltab.
- Click the drop-down menu forBackground color.Choose a color in the background color palette. Click theOKbutton. Note: You can also add or change the background pattern.

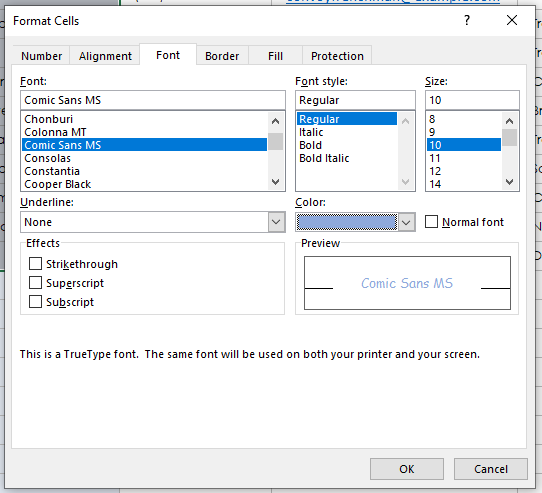
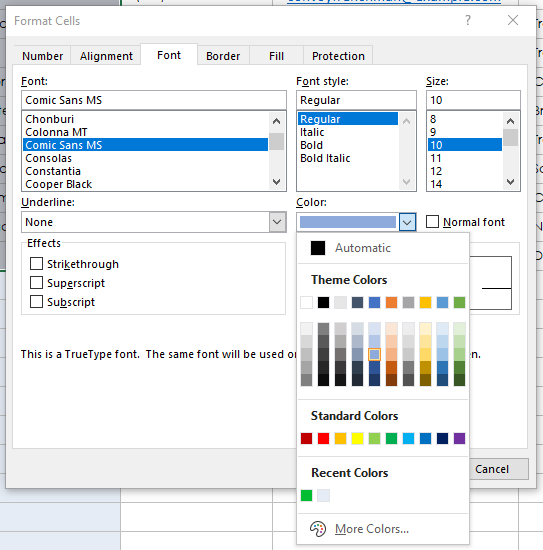
Change the Font
- Click the cell you want to change. Right-click and clickFormat Cells...
- Click theFonttab.
- Click and scroll through the list of fonts, and select the one you want. Do the same to change the font style, font size, and color, as well as to underline. You can also add strikethrough, superscript, and subscript effects from this window. Make your selections and click theOKbutton.

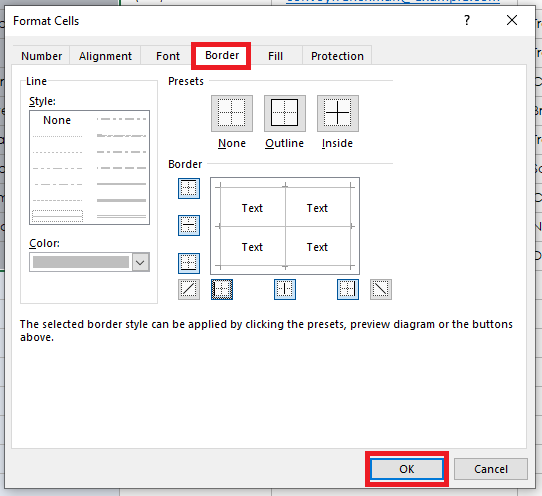
Add or Remove Borders Around Cells
- Click the cell you want to change. Right-click and clickFormat Cells...
- Click theBordertab.
- Click a line风格,颜色,andBordertype. After you make your selections, click theOKbutton.

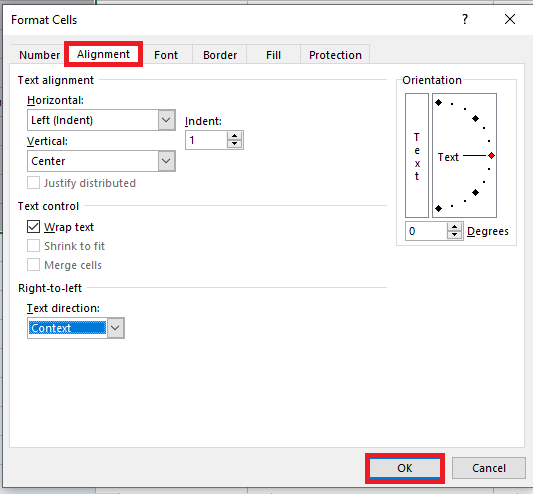
Change the Alignment of the Text Within a Cell
- Click the cell you want to change. Right-click and clickFormat Cells...
- Click theAlignmenttab.
- Select the horizontal and vertical alignment of text in cells from the corresponding drop-down menus. Change the number of degrees to adjust the orientation of the text in the cell. After you make your selections, click theOKbutton.Pro Tip:Orientation is a fun tool to stylize the title fields in your database. Select your title fields and change the orientation to 45 degrees for an interesting visual effect.


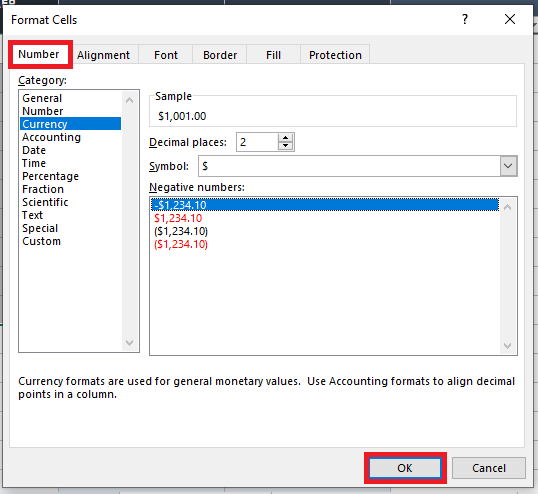
改变数字的显示风格
- Click the cell you want to change. Right-click and clickFormat Cells...
- Click theNumbertab.
- Click through each option to change how the spreadsheet is displaying numbers. You can adjust how it shows currency, with decimals and dollar signs, dates, with a consistent date format, percentages, and more. Choose the category that best describes how you would like numbers to be displayed and click theOKbutton.

Add Logos and Pictures
- Click the area where you would like to add a logo or picture.
- Click theInserttab on the ribbon.
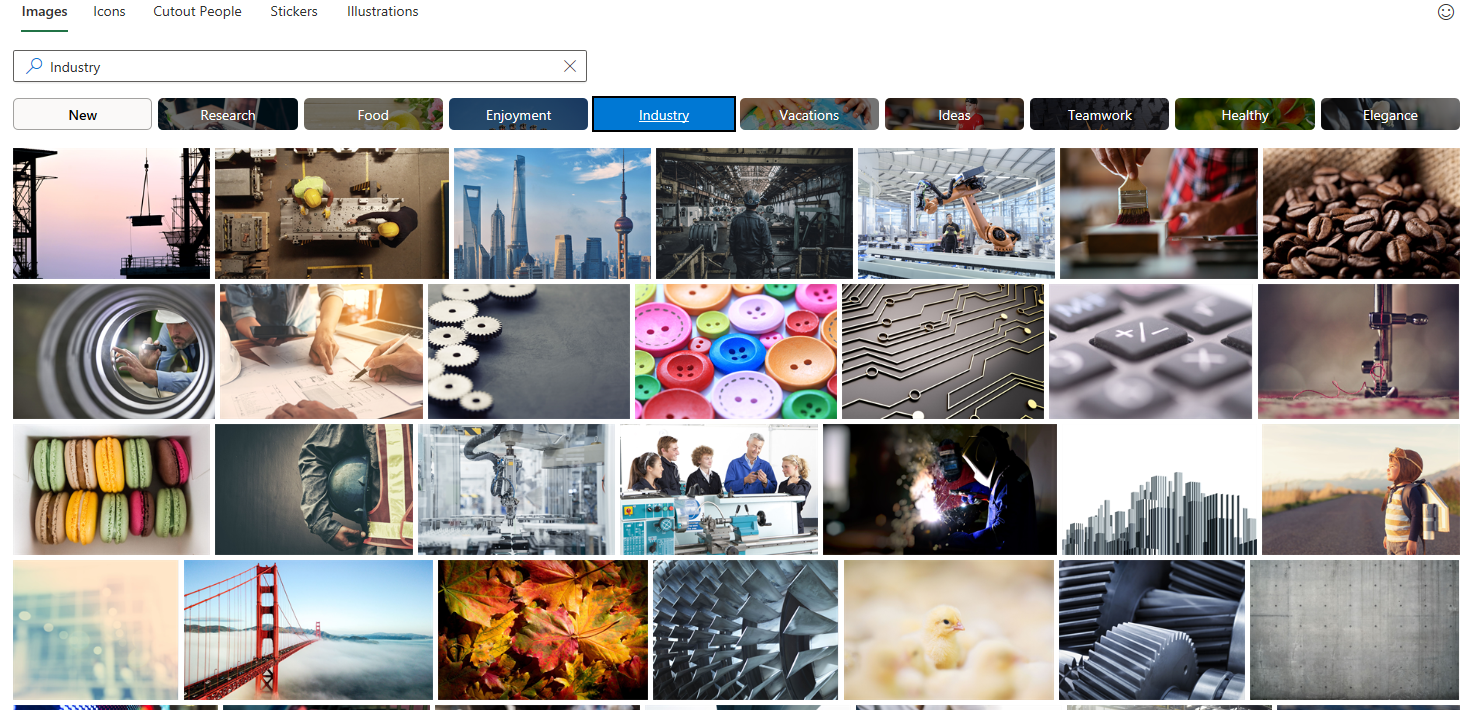
- ClickPicturesand choose the location of the image you want to insert into the cell.Pro Tip:Excel has a large catalog of photos that you may find useful for personalizing your database in theStock Imagesselection.
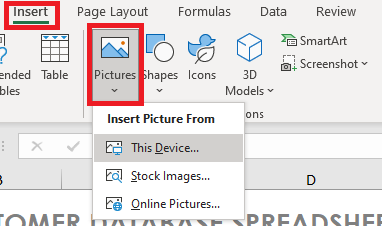
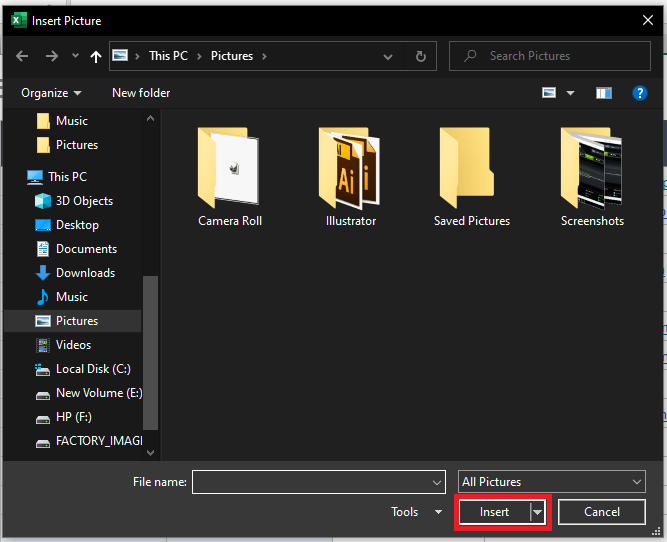
- If the image you are looking for is on the computer you are currently working on, clickThis Device. Navigate to the folder containing the image you would like to insert. Select the image and click theInsertbutton.
- Once you insert your image, press and hold theShiftkey on your keyboard, then click and drag one of the corner circles of the image to resize it. Release the Shift key, then click and drag the center of the image and place it where you like.
Note:You may need to resize a row or column to make room for your image. Click the row you need to change, click on the green square at the corner of the row, and drag it to expand or shrink.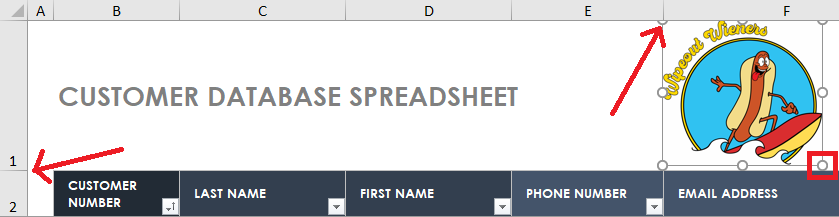


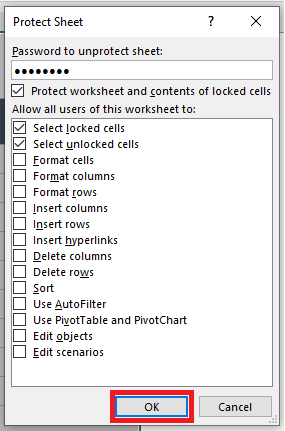
Protect Your Database from Unwanted Changes
- When you have completed customizing the customer database, you should protect it from accidental changes. Click anywhere on the spreadsheet. (Note: You can also highlight and select specific cells.)
- Click theReviewtab on the ribbon.
- ClickProtect Sheet.

- You can set a password for your document. Users without the password can only perform the actions that you select in this window. Users with the password will have full editing capabilities.
- Make your selections, and click theOKbutton.Pro Tip:It is a good idea to protect your database when you share it with people who need to view but do not need to make changes to it.


Tips for Working With a Customer Database in Microsoft Excel
There are a number of ways to use a customer database in Excel. We’ve outlined steps to sort, filter, and automatically number the rows in your database below.
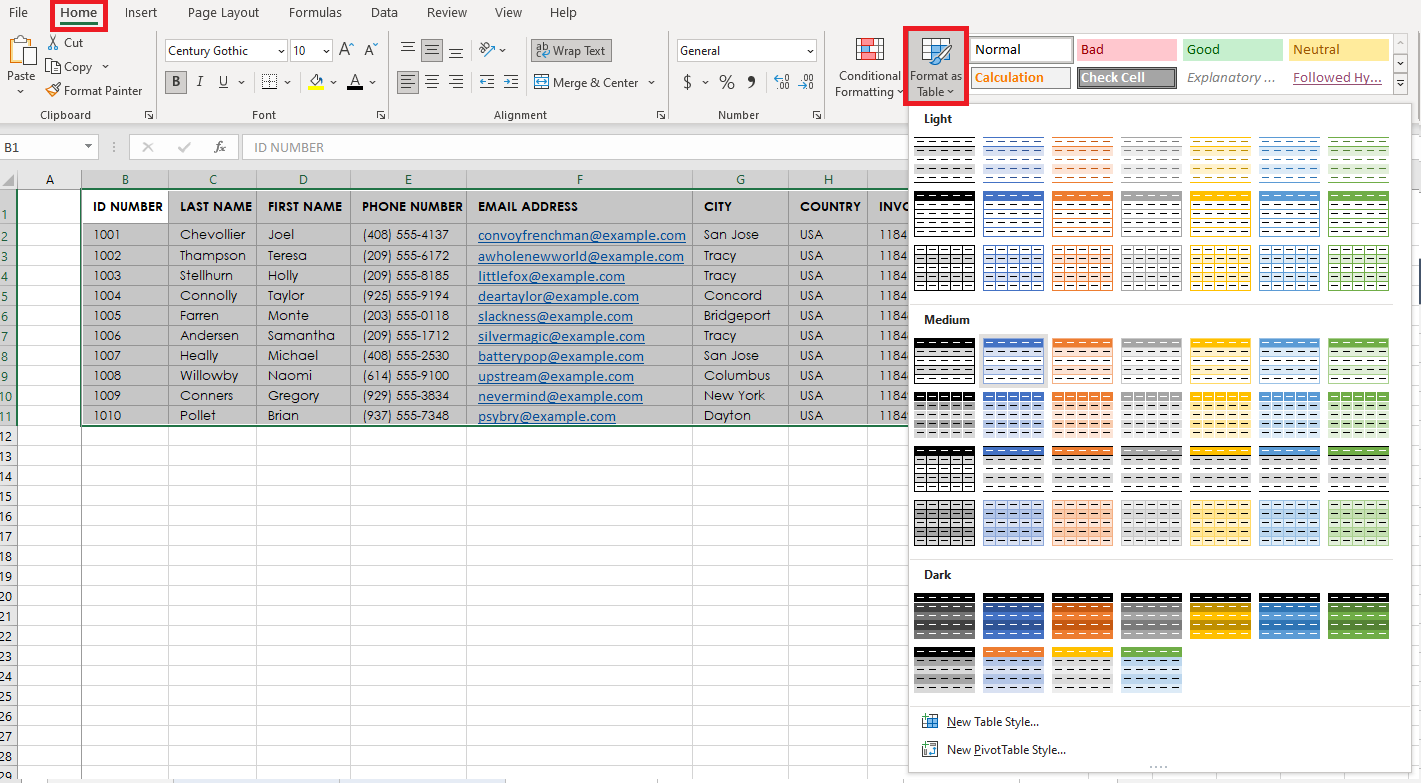
How to Filter Your Records by Specific Fields
- To find the records that match certain criteria (in this example, customer records from the same city), format your data as a table by highlighting all of the data you have entered, including your field titles.
- Click theHometab, then clickFormat as Tableand choose a style.
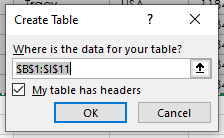
- TheCreate Tablewindow will open. If your data is already highlighted, theCreate Tablewindow will automatically populate with the location of your data.
- Make sure you select theMy table has headerscheck box and then click theOKbutton.
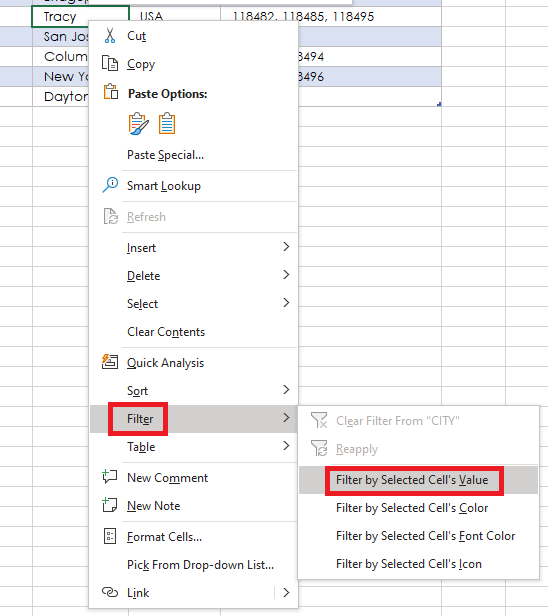
- Next, right-click on the cell you would like to filter your results by. In this example, we only want to see the records of customers that come from Tracy.
- Click onFilterin the drop-down menu, then clickFilter by Selected Cell’s Value.
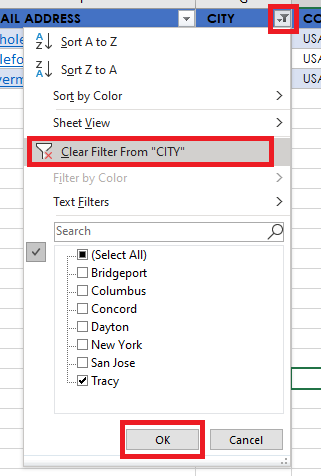
- The records that do not contain the word “Tracy” in theCityfield will be hidden from view. To reveal the hidden records, click the arrow button in theCityfield.
- ClickClear Filter From “CITY” in the drop-down menu, and then click theOKbutton.Pro Tip:The drop-down menu will automatically populate the title of your field in theClear Filter Fromselection, so make sure that it matches the filter you would like to clear.


Easily Create, Customize, and Maintain a Customer Database in Smartsheet
Empower your people to go above and beyond with a flexible platform designed to match the needs of your team — and adapt as those needs change.
The Smartsheet platform makes it easy to plan, capture, manage, and report on work from anywhere, helping your team be more effective and get more done. Report on key metrics and get real-time visibility into work as it happens with roll-up reports, dashboards, and automated workflows built to keep your team connected and informed.
When teams have clarity into the work getting done, there’s no telling how much more they can accomplish in the same amount of time.Try Smartsheet for free, today.