How to Make a Gantt Chart Using the Table Function in PowerPoint
The table function in PowerPoint allows you to build and display data and information with columns and cells. Use this method to create a Gantt chart that lets you easily list and adjust project tasks, start dates, and end dates.
To make aGantt chartin PowerPoint using the table function, follow these helpful steps. These steps are compatible with all versions of PowerPoint.
Prepare Your PowerPoint Presentation
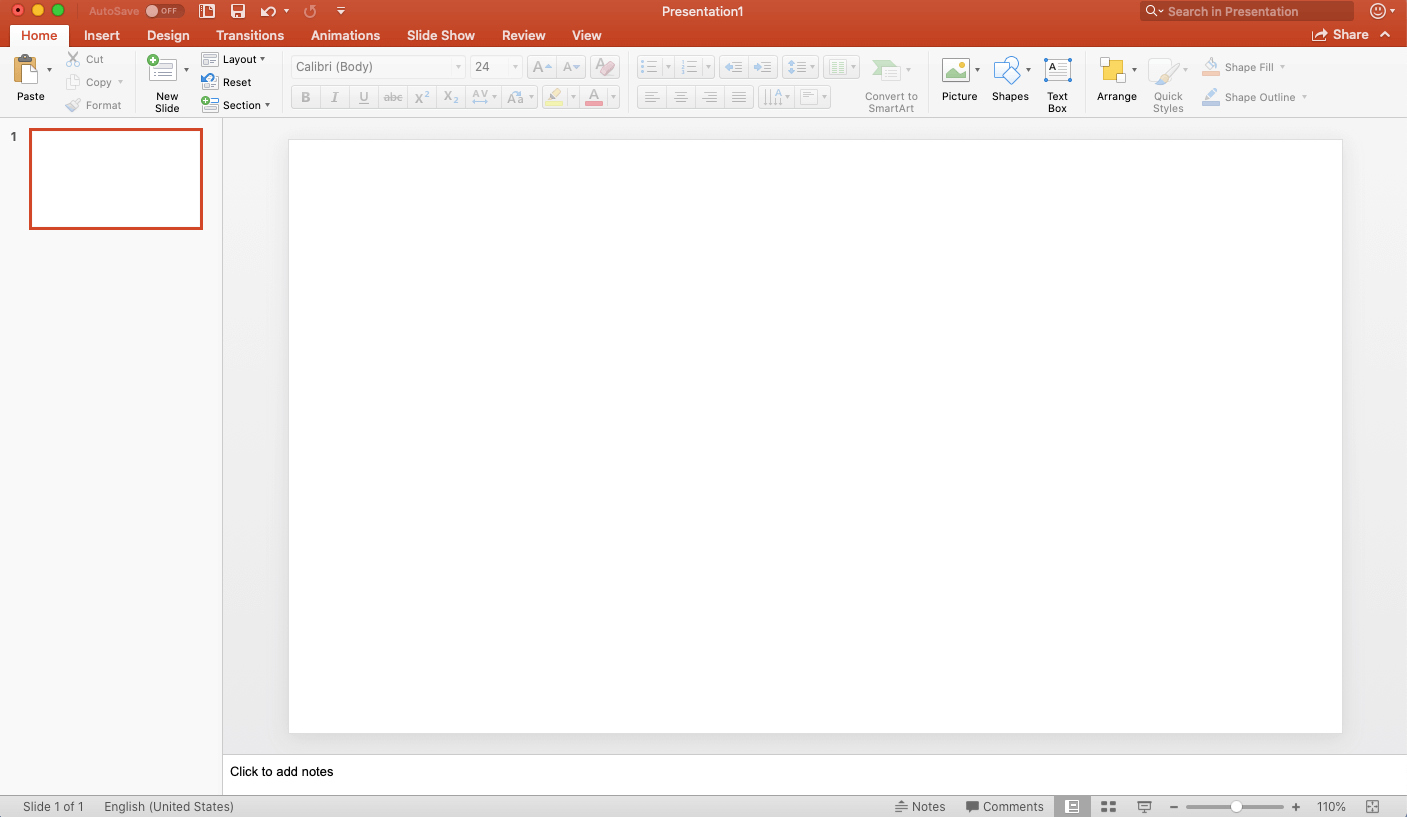
- Open a new PowerPoint presentation.
- ClickBlank Presentation.


Add a Table to a PowerPoint Presentation
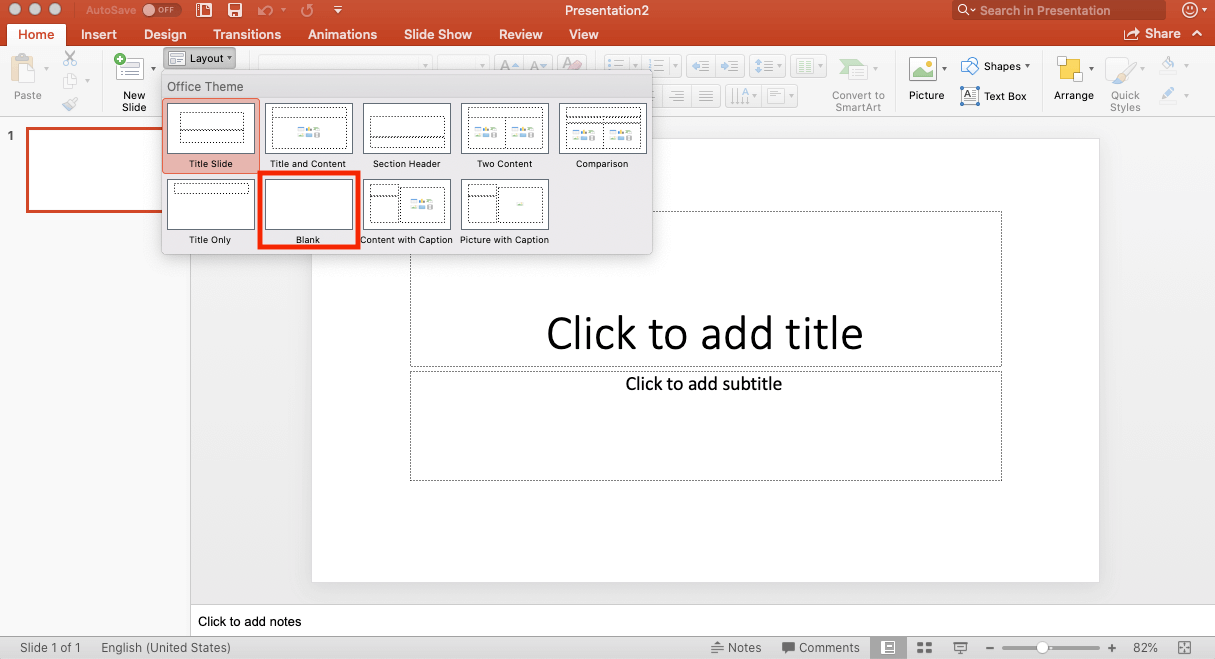
- Click theLayoutdropdown menu on theHometab on the top navigation bar, and clickBlankto remove theTitleandSubtitletext areas.
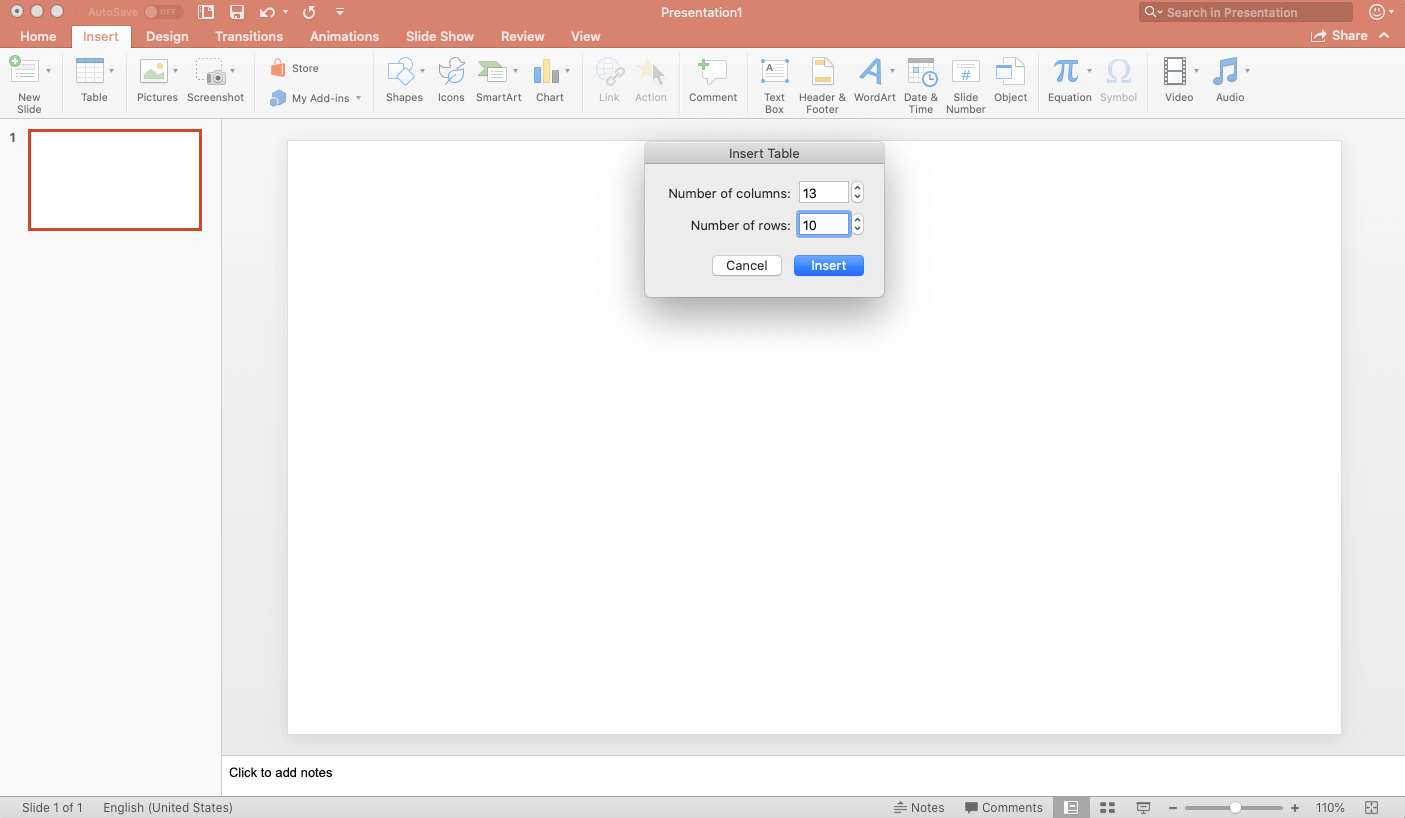
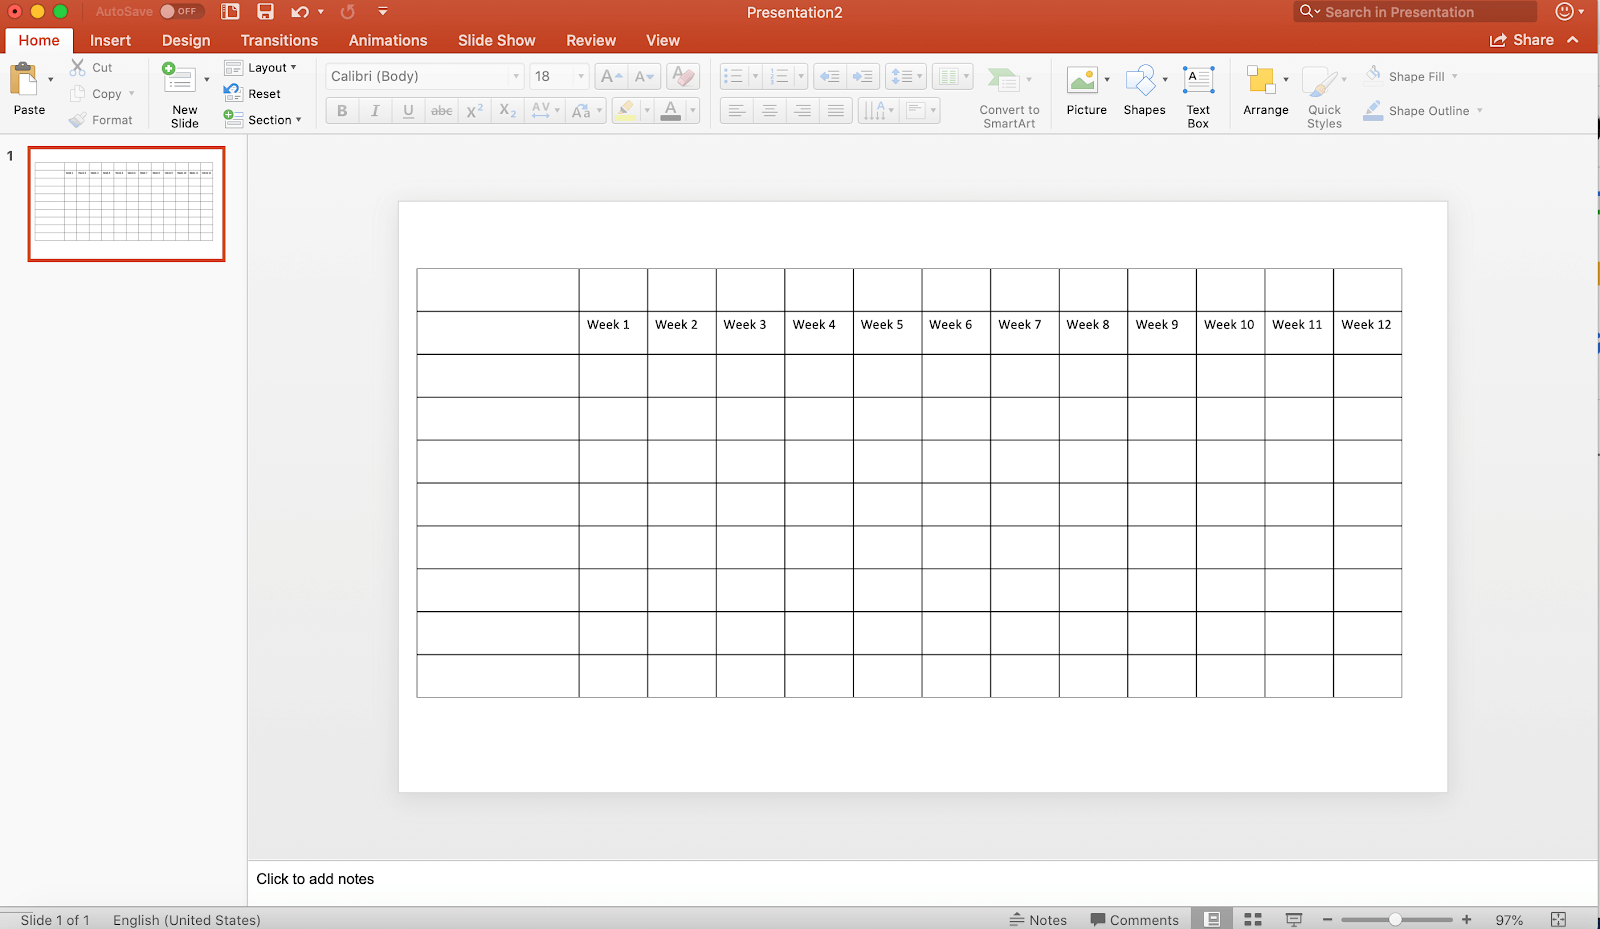
- Click the slide, click theInserttab on the top navigation bar, and clickTable.
- Add a table either by selecting the number of rows and columns from the grid or by clickingInsert Tableand inputting the number of rows and columns.
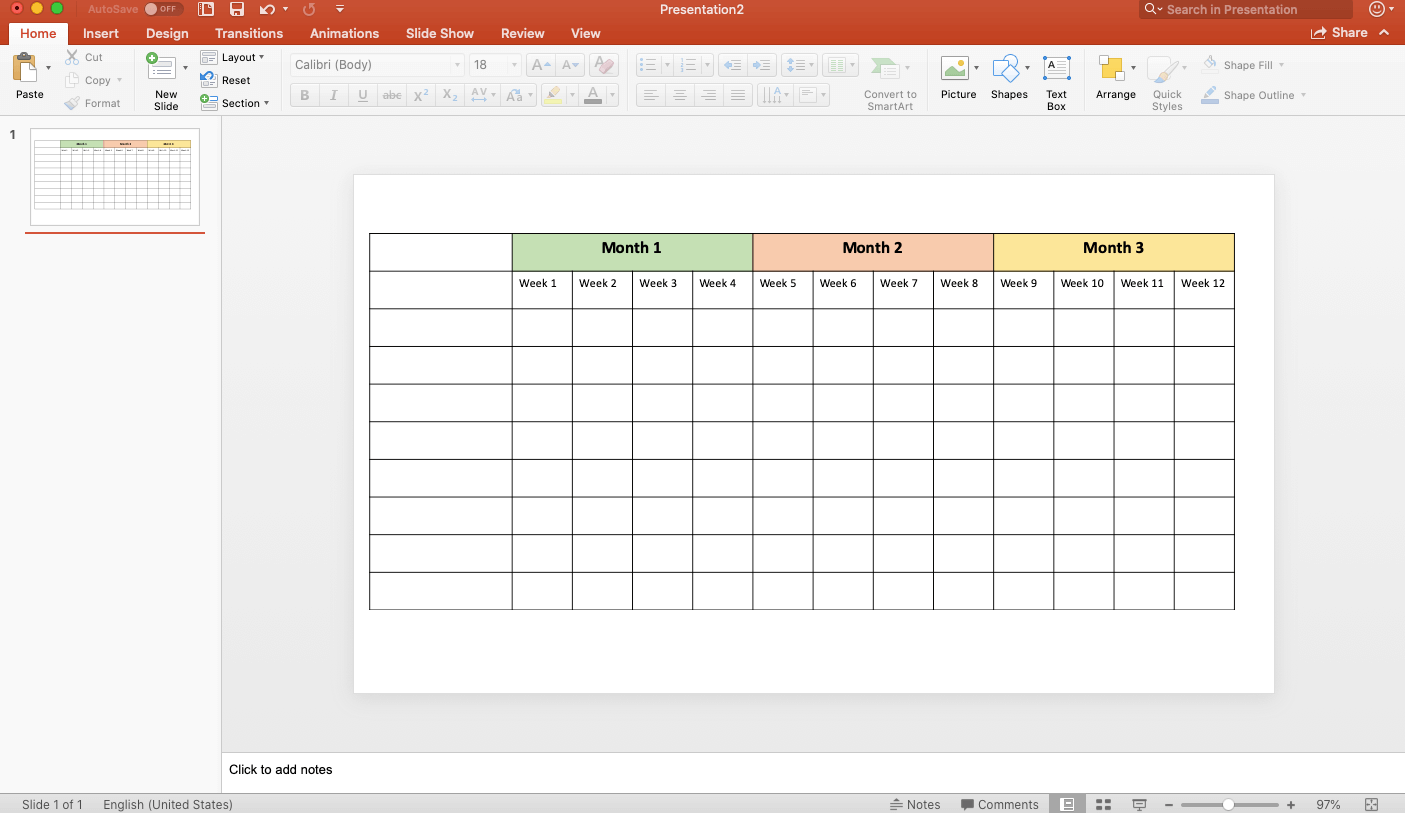
- For this example, add 13 columns and 10 rows to your table. Your numbers will depend on the amount of tasks that comprise your project (rows) and the duration, in weeks, that tasks will take to complete (columns). Click the blueInsertbutton.


Adjust the Table’s Column Widths
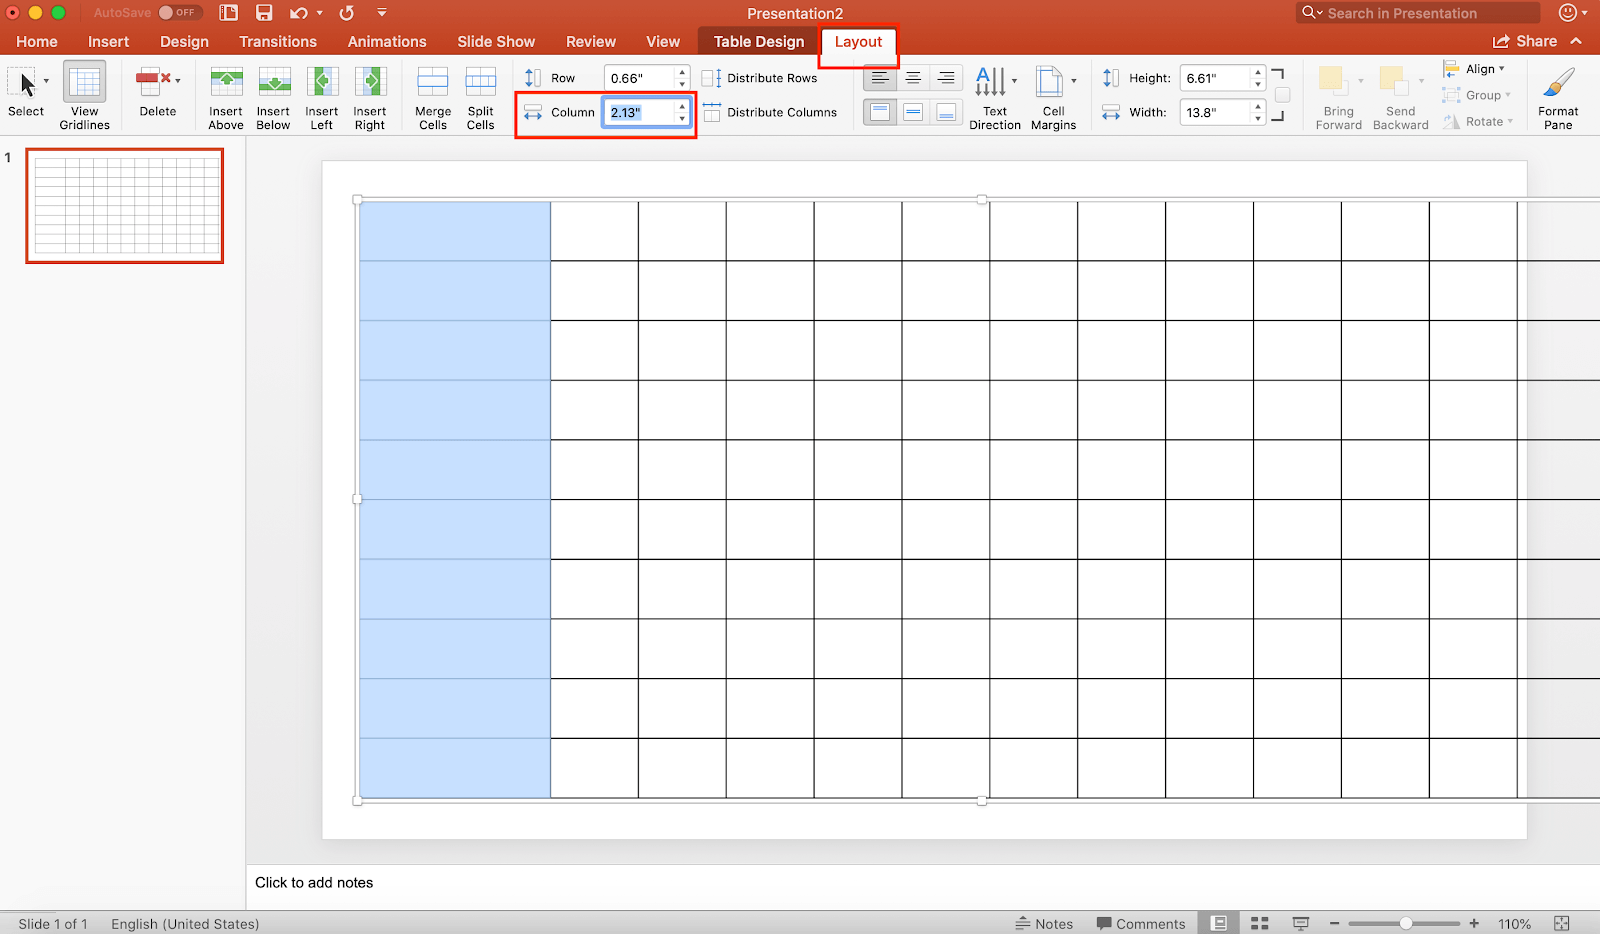
- Highlight the first column.
- Click theLayouttab on the top navigation bar.
- In theColumnbox, enter 2.13.
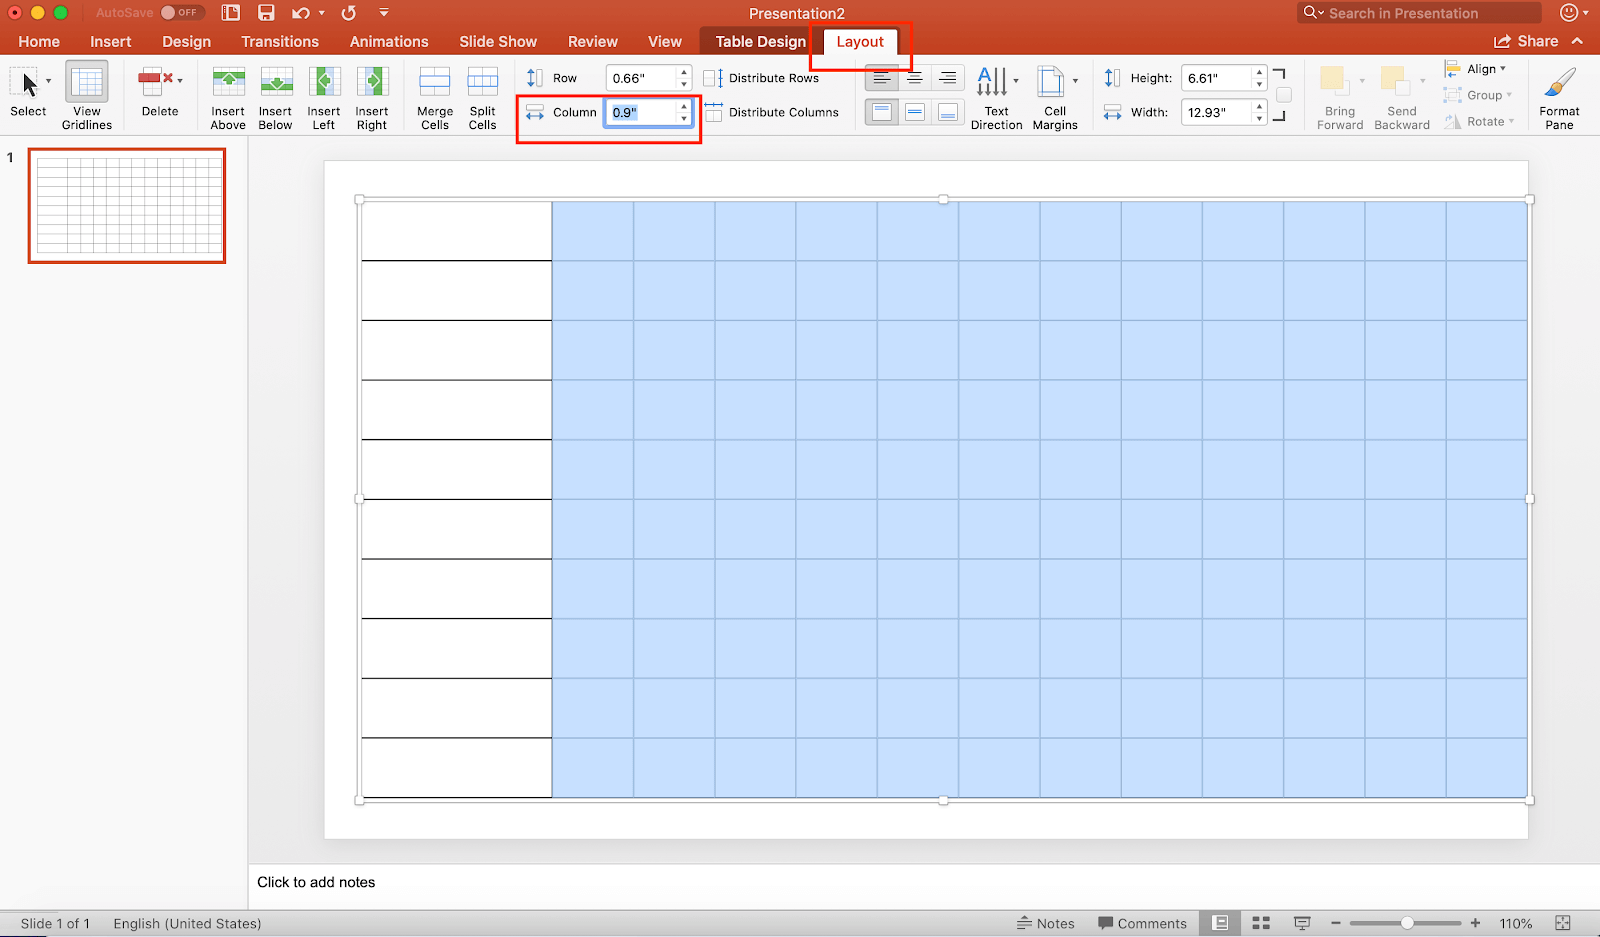
- Highlight the remaining columns in the table.
- In theColumnbox, enter 0.9.


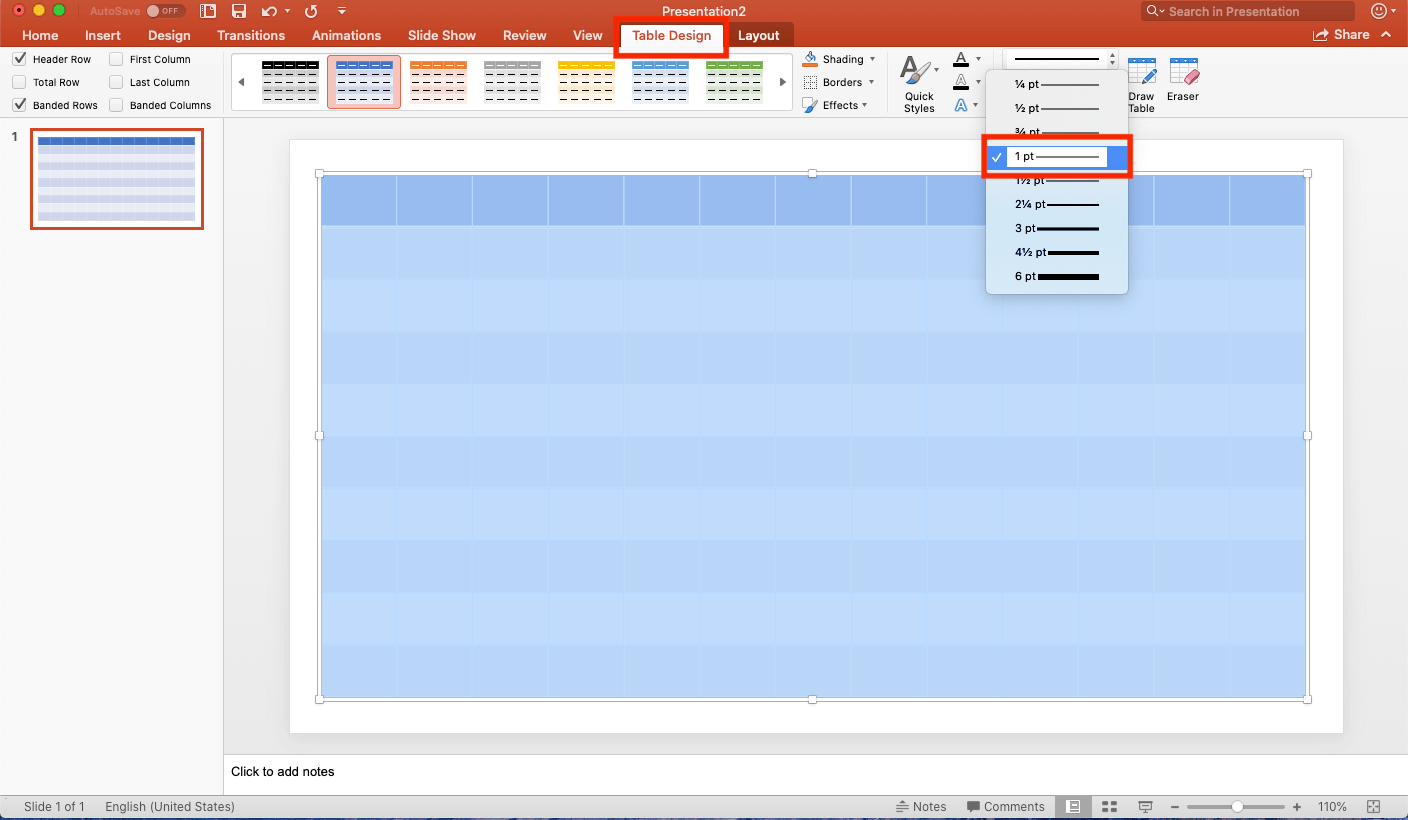
Adjust the Color of Gridlines in the Table
- Highlight the table.
- Click theTable Designtab on the top navigation bar.
- From the dropdown menu, select1pt.
- Click theBordersdropdown menu, and clickAll Borders.
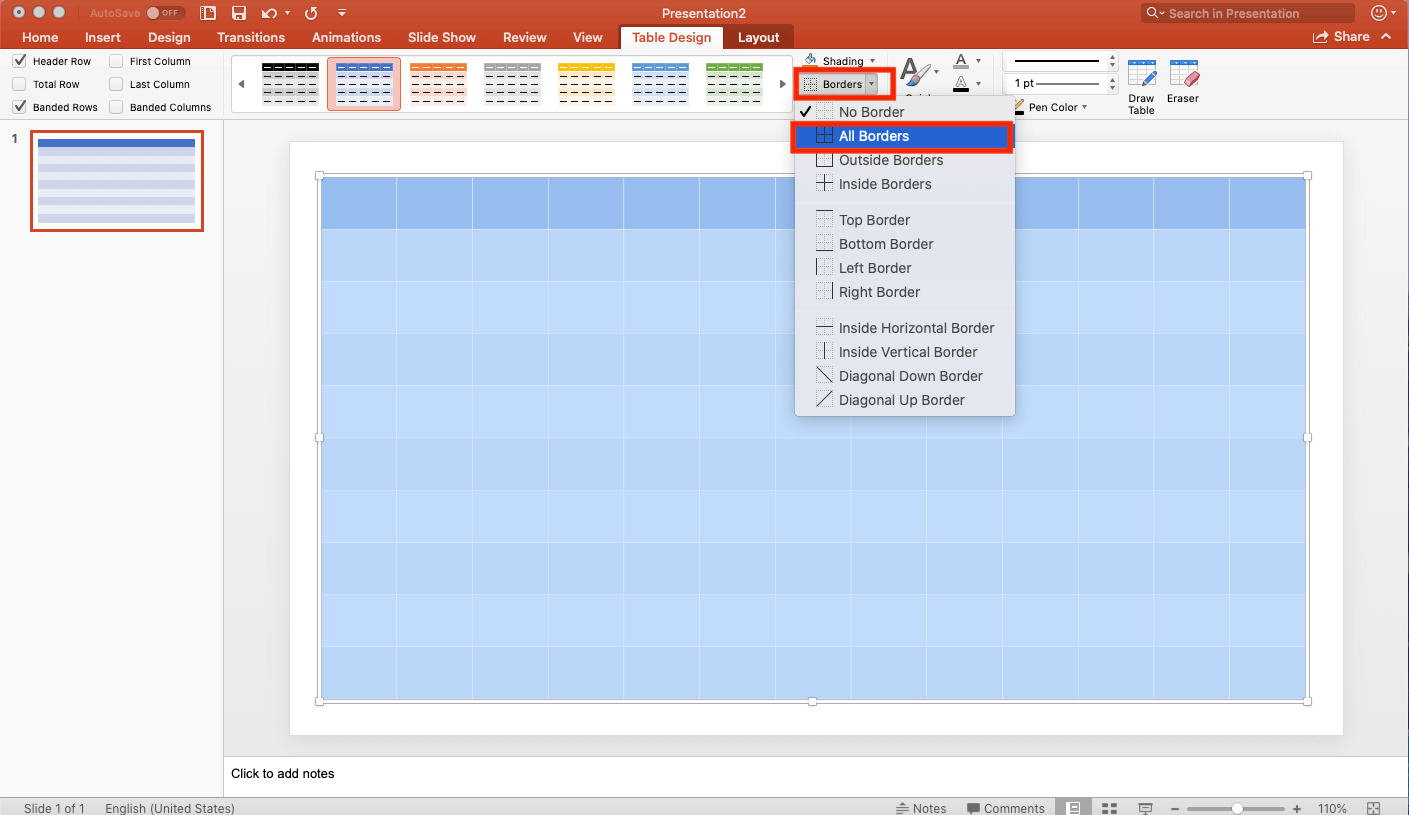
- Click theShadingdropdown menu, and clickNo Fill.


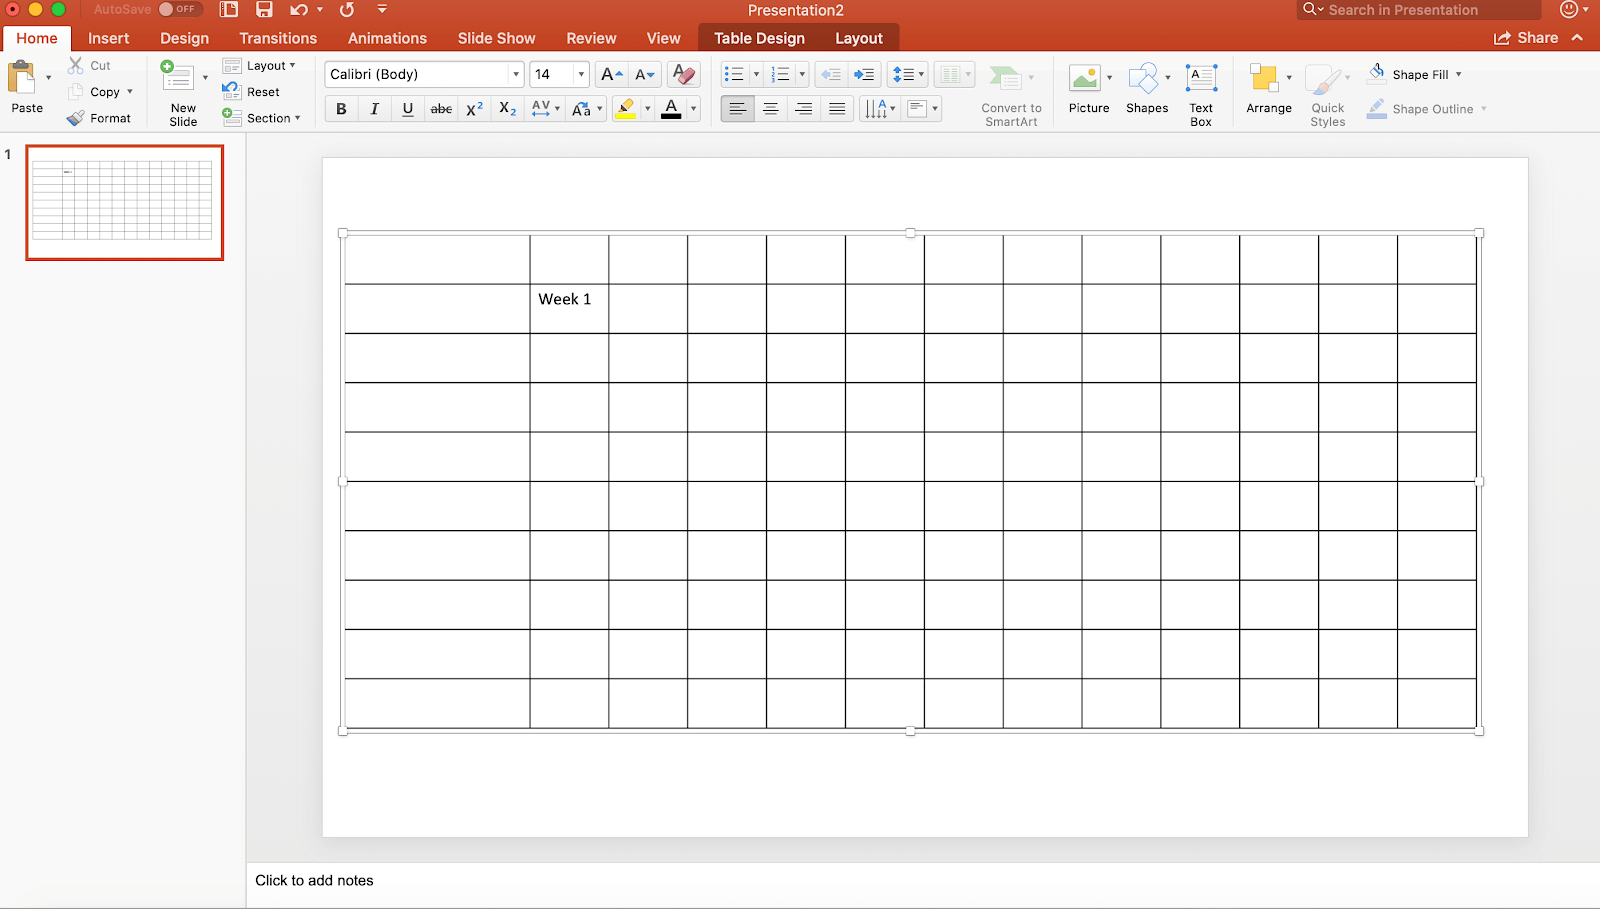
Add Labels to Table Columns
- In the second column, in the second row, typeWeek 1.
- 在随后的细胞在第二行,接下来的c类型orresponding Week (ex: Week 2, Week 3, and so on).


Merge Top Row Cells in the Table
- Click theLayouttab on the navigation bar.
- In the first row, highlight rows 2-5 (the cells above week 1-4).
- Click theMerge Cellsbutton to create one cell from the selected cells.
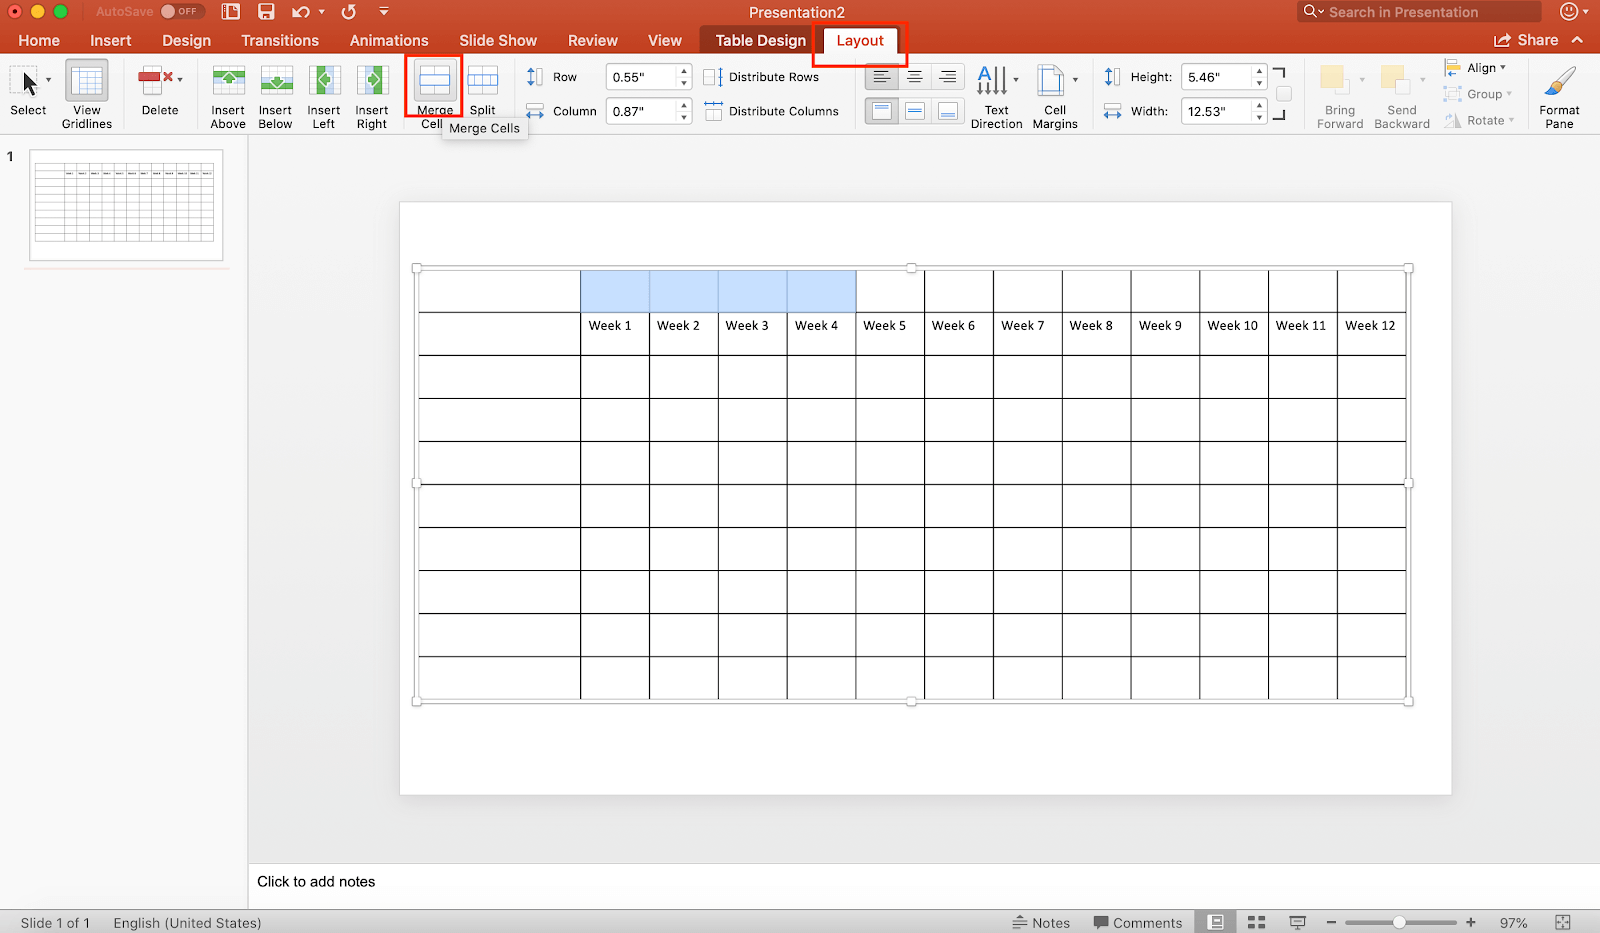
- In the newly merged cell, typeMonth 1.
- Repeat these steps for each set of the next four cells. TypeMonth 2andMonth 3in the respective merged cells.
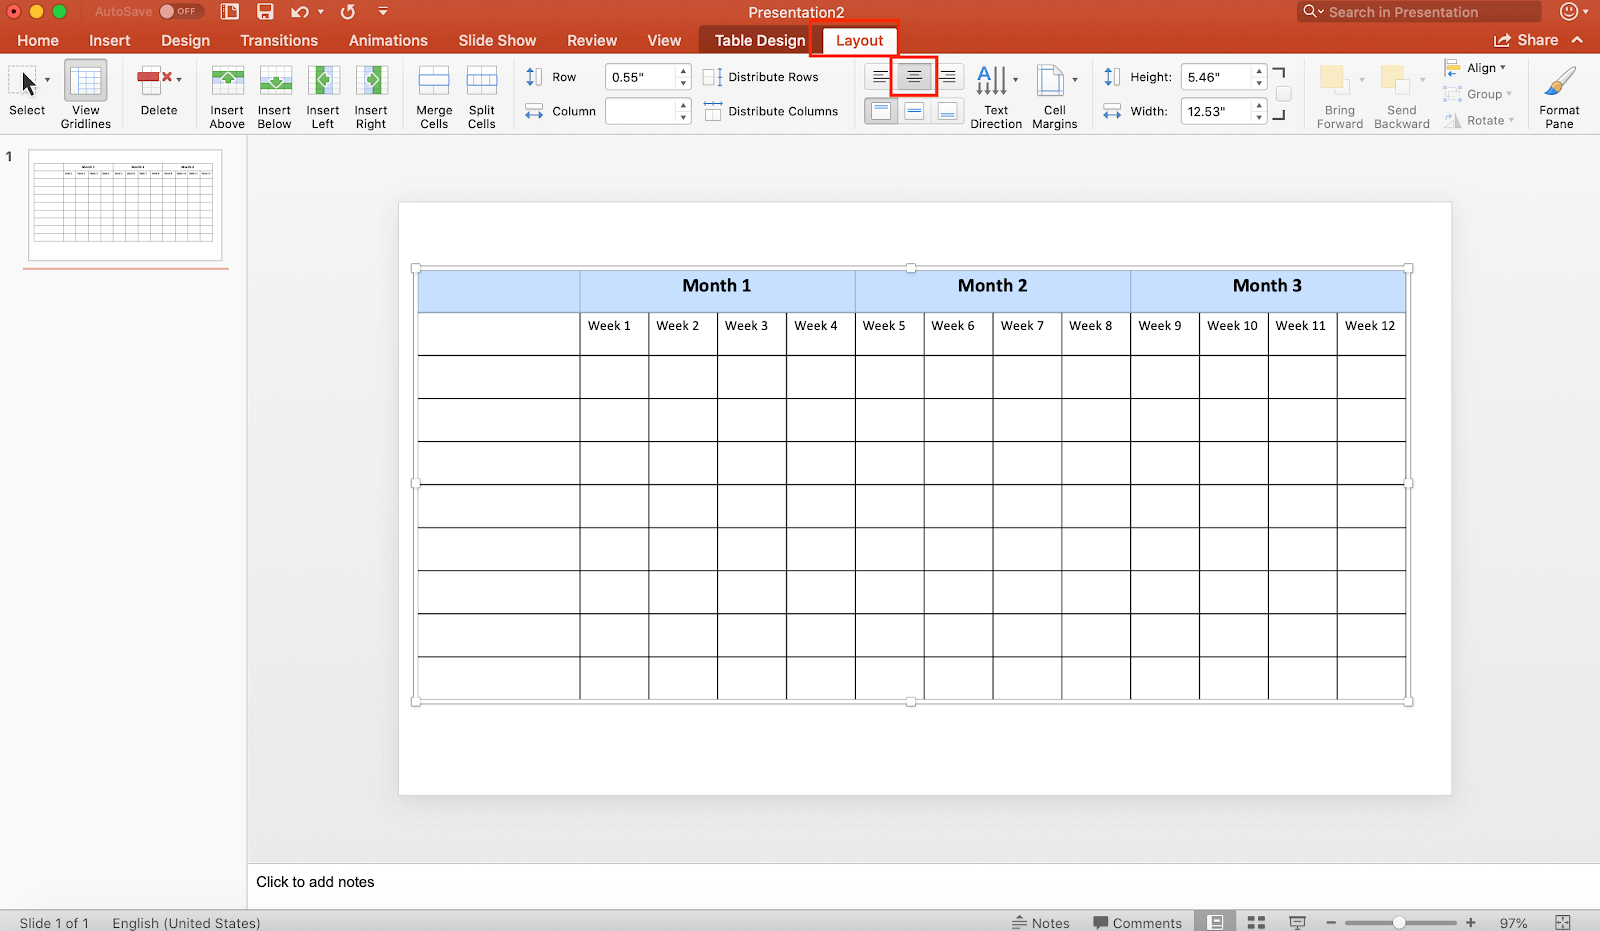
- Once you add all months to the top row, highlight the top row. Click theCenter Alignicon to center the labels in the merged cells.


Color Code the Top Row in the Table
- Highlight the merged cell labeledMonth 1.
- Click theTable Designtab on the top navigation bar. Click theShadingdropdown menu, and click a color for the cell.
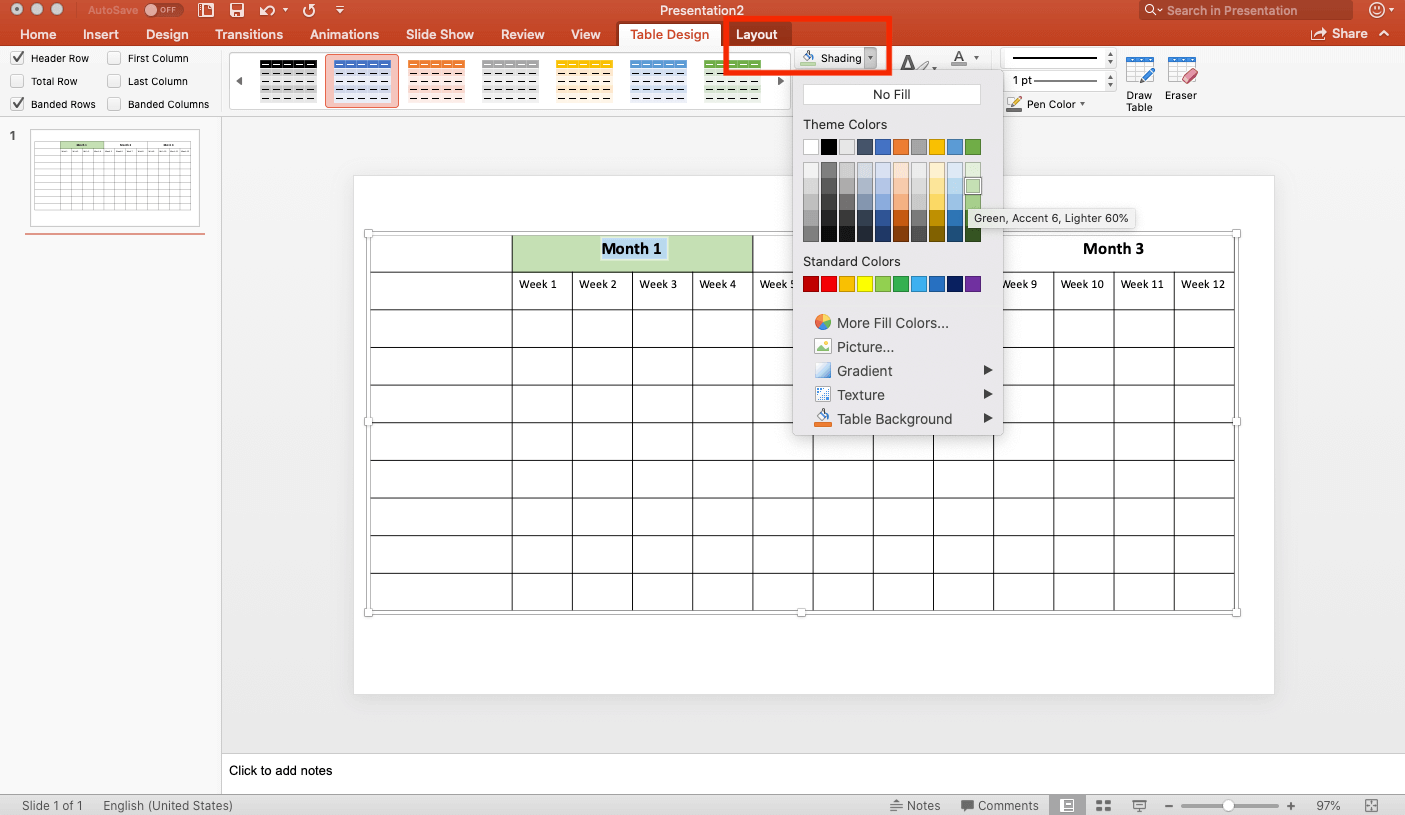
- Repeat these steps for the other merged cells.


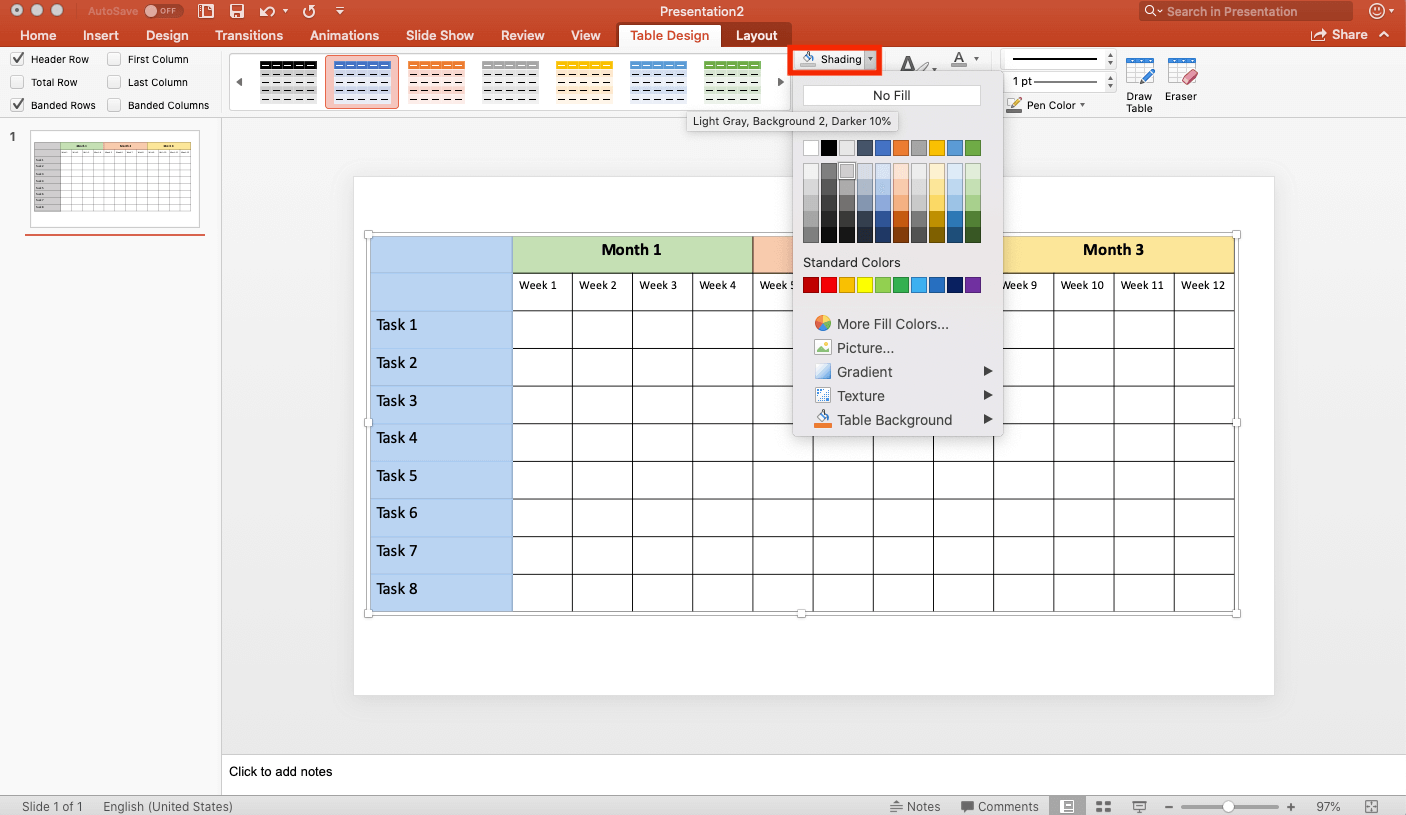
Add Project Tasks to the Table
- Type your first project in the third cell of the first column.
- List your respective projects tasks, in order from start to finish, in the following cells in the column.
- Once you add all the tasks, highlight the column. Click theTable Designtab. Click theShadingdropdown menu, and click a muted grey color to differentiate the project task column.


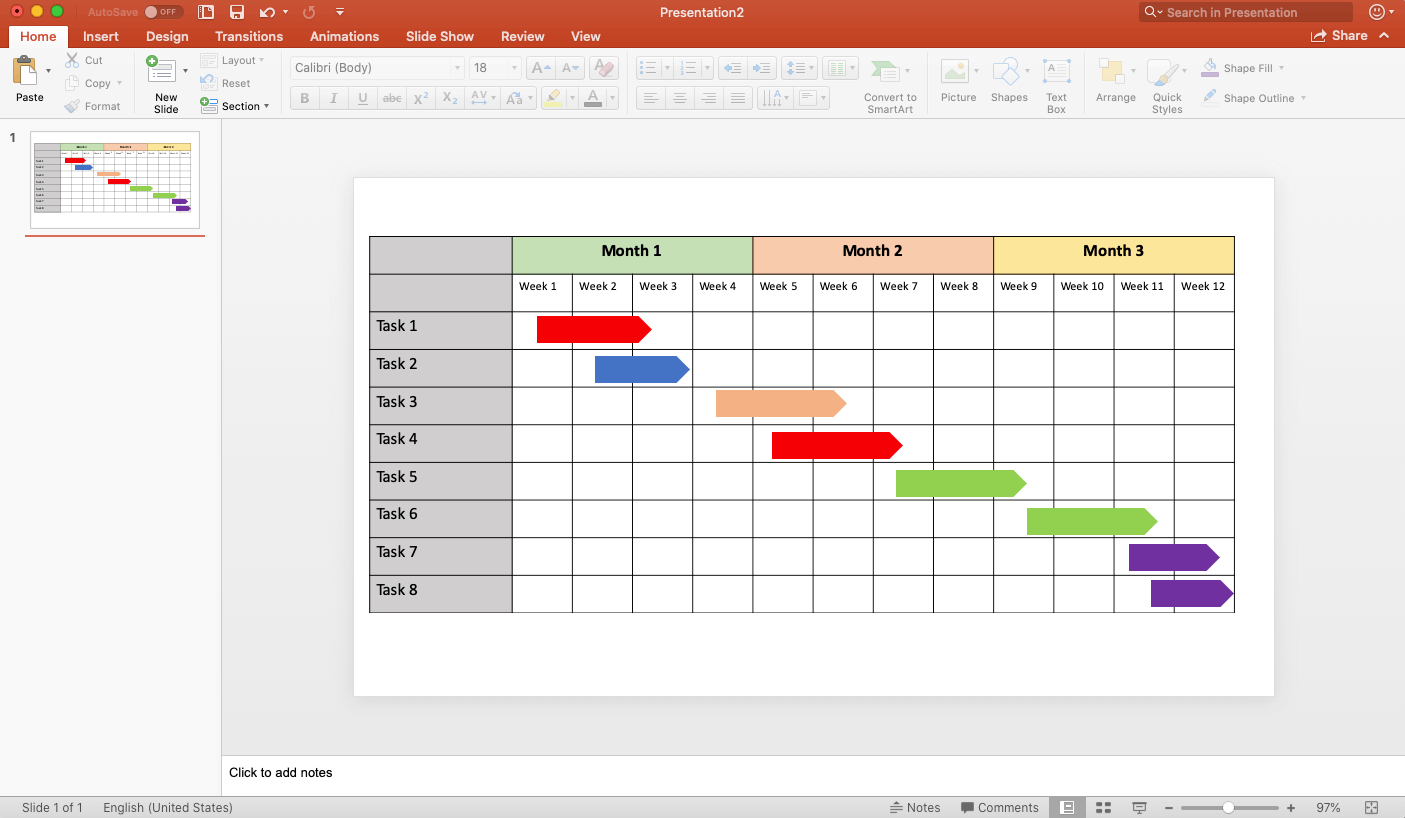
Insert Task Bars in the Table
- Click theInserttab on the top navigation bar.
- Click the second cell in the second row.
- Click theShapesdropdown menu. In theBlock Arrowssection, clickArrow: Pentagon.
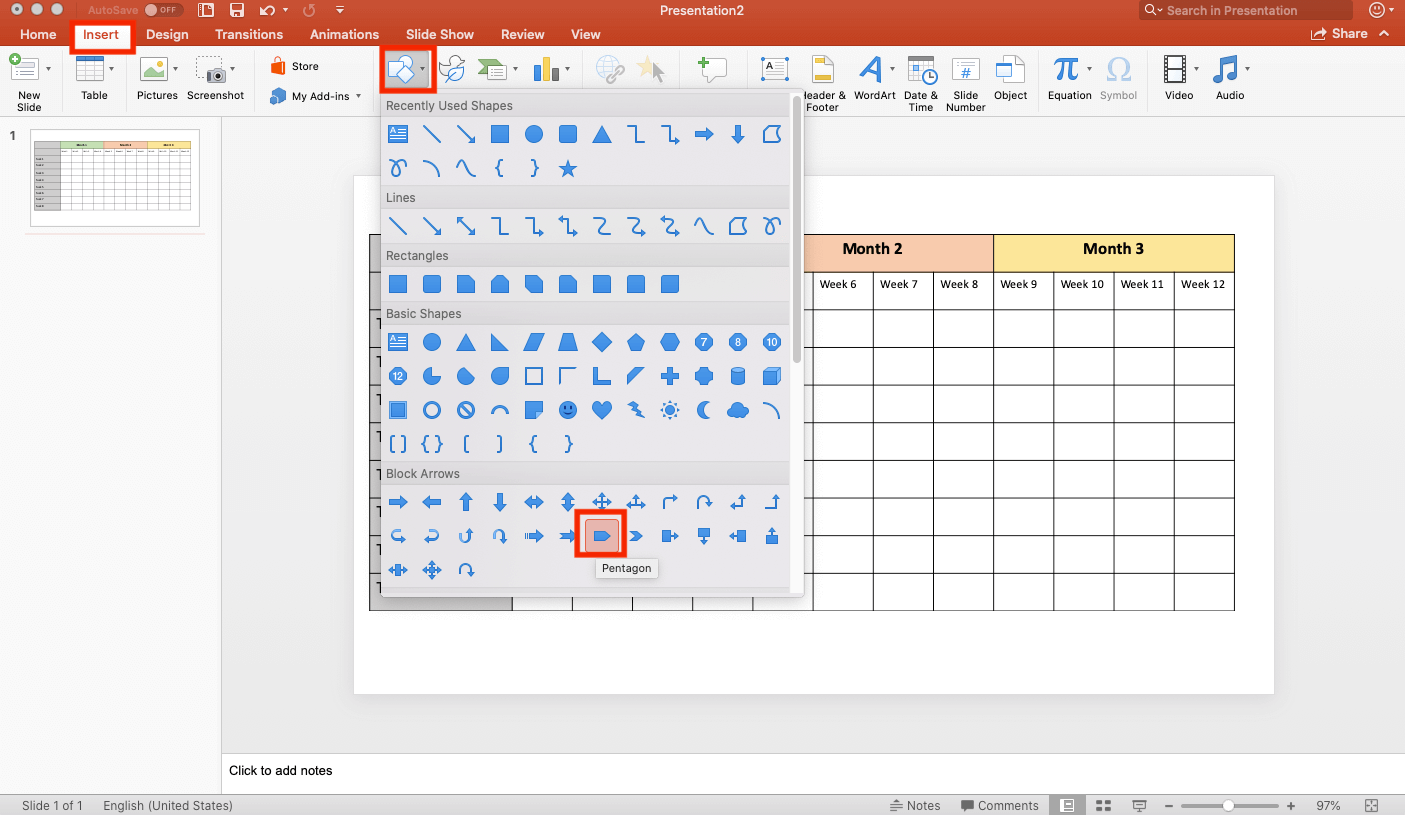
- Drag the shape from the start week to the end week. This shape signifies the project task’s start and end date.
Example: If a task starts in week one and ends in week three, the shape should extend from week one through week three.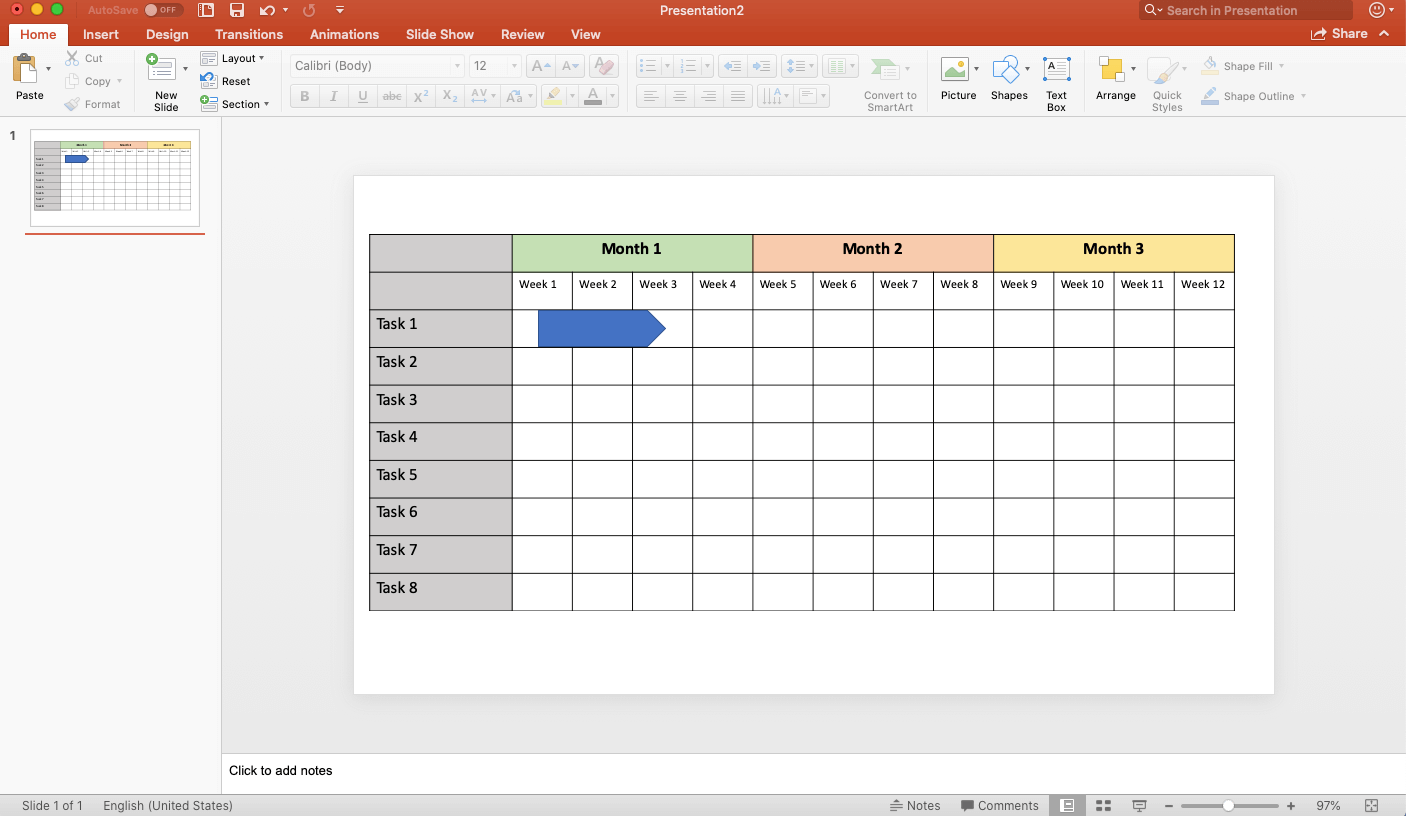
- Repeat these steps for every project task listed in the table.
Pro Tip:If you need to change the project task start or end date in the table, click the task icon bar and move the shape to the appropriate spot on the table. You can also drag the front or back of the shape, lengthening or shortening it as necessary.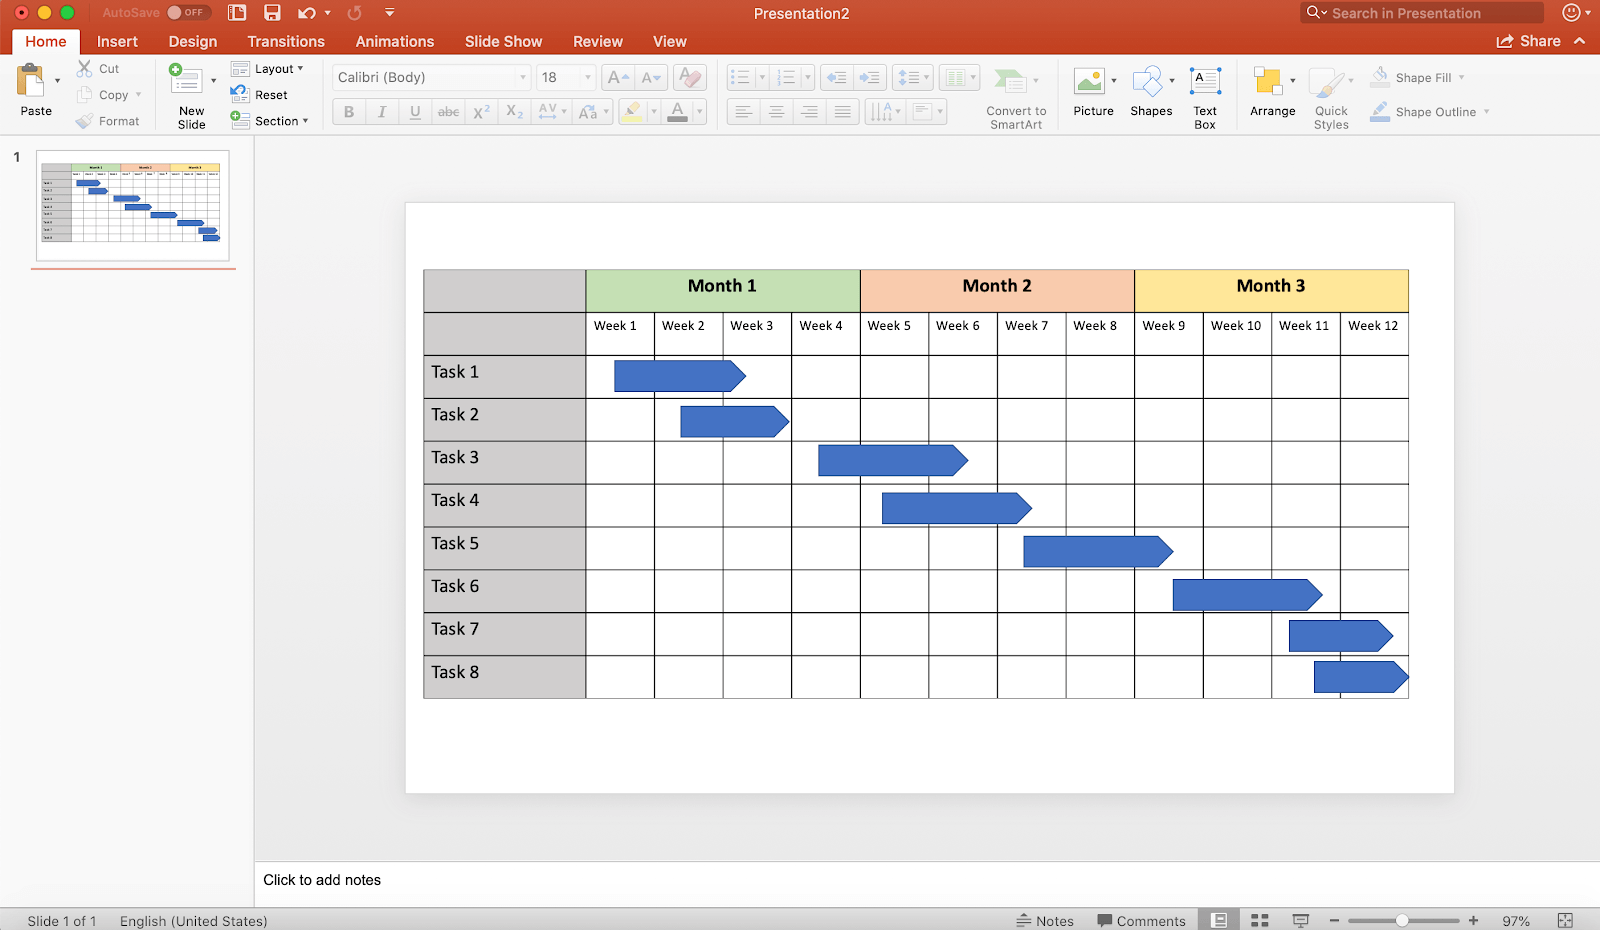

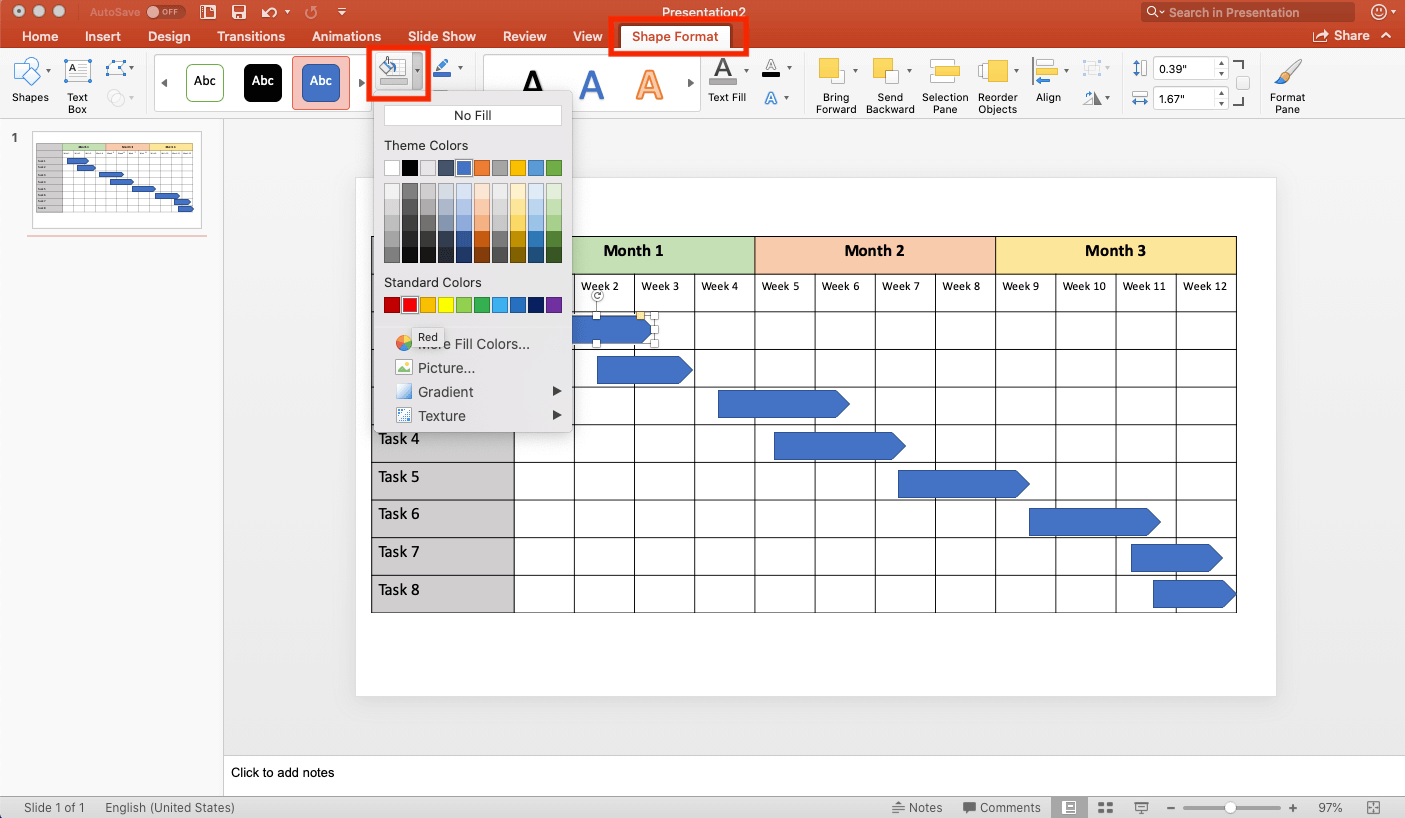
Customize the Task Bar Colors and Outlines in the Table
- Click one of the new task bars.
- Click theShape Formattab on the top navigation bar. ClickShape Fill, and click a color (we chose red).
- ClickShape Outline, and clickNo Outlinefrom the dropdown menu.
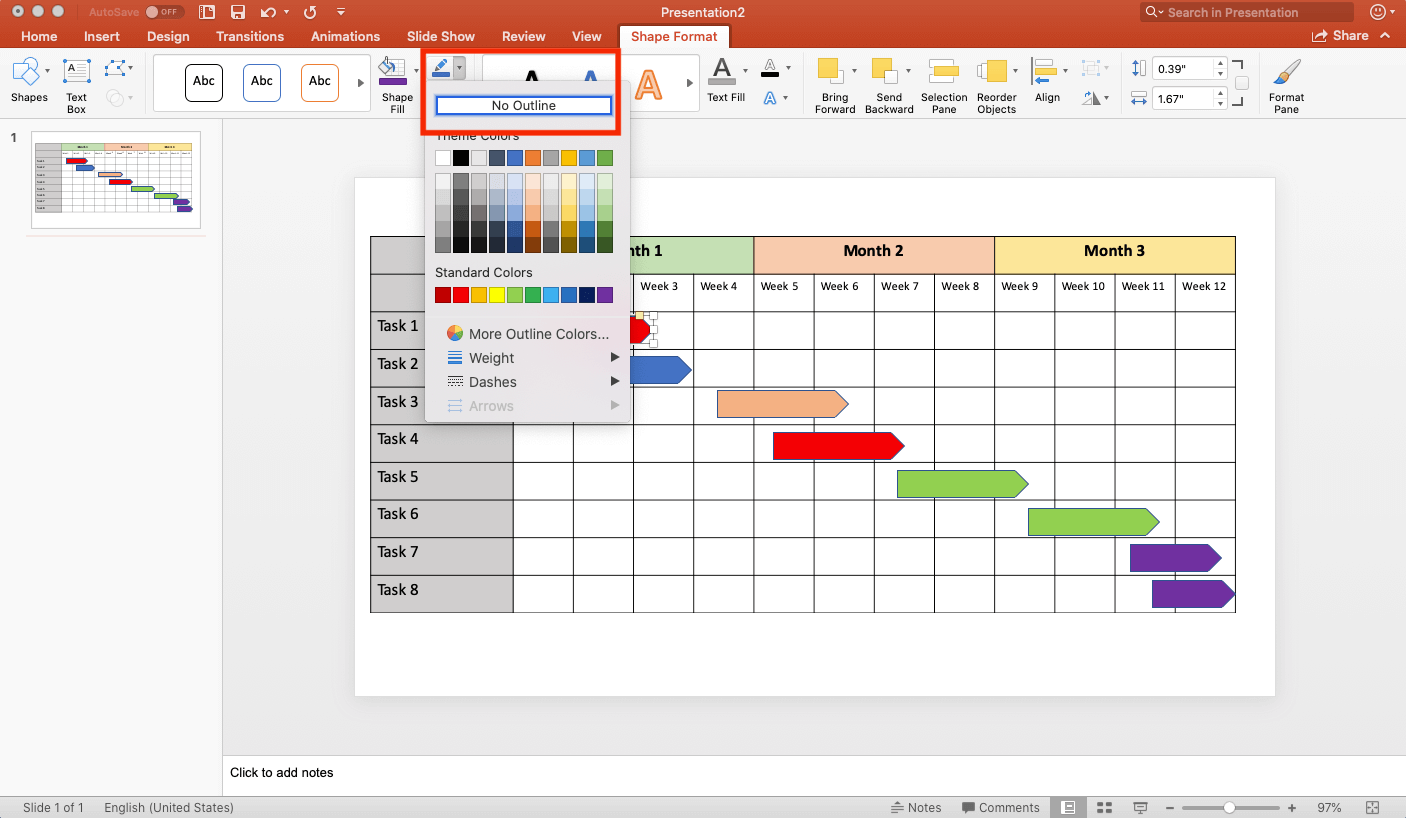
- Repeat these steps for every project task bar in the table.


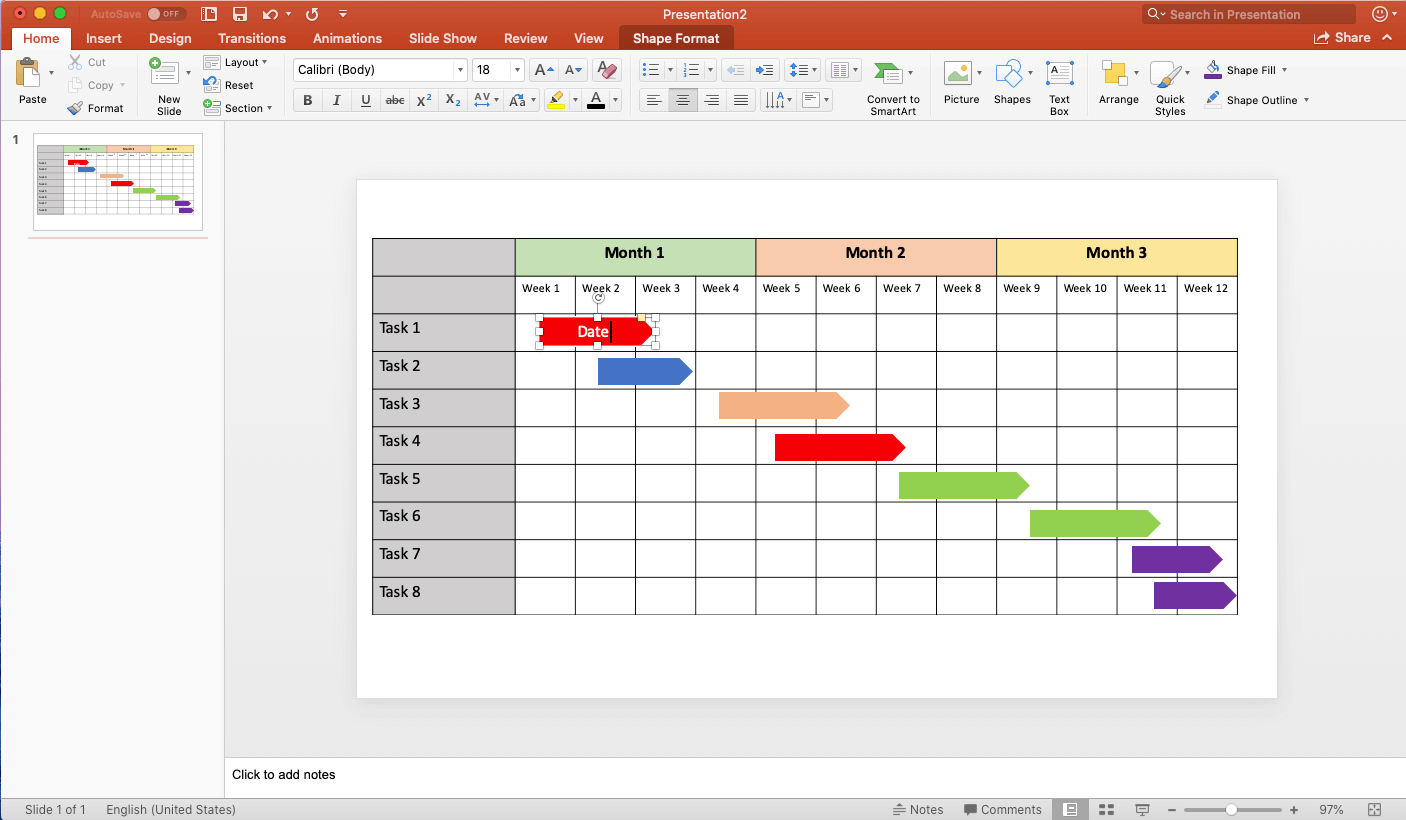
Add Dates to Task Bars to the Table
- Double-click on a task bar. A text box appears within the shape.
- Type the start and end date of the task within the shape.
- Repeat these steps for other project task bars where you want to see the date.

Add Milestones to the Gantt Chart
- Click theInserttab on the top navigation bar. Click theIconsbutton.
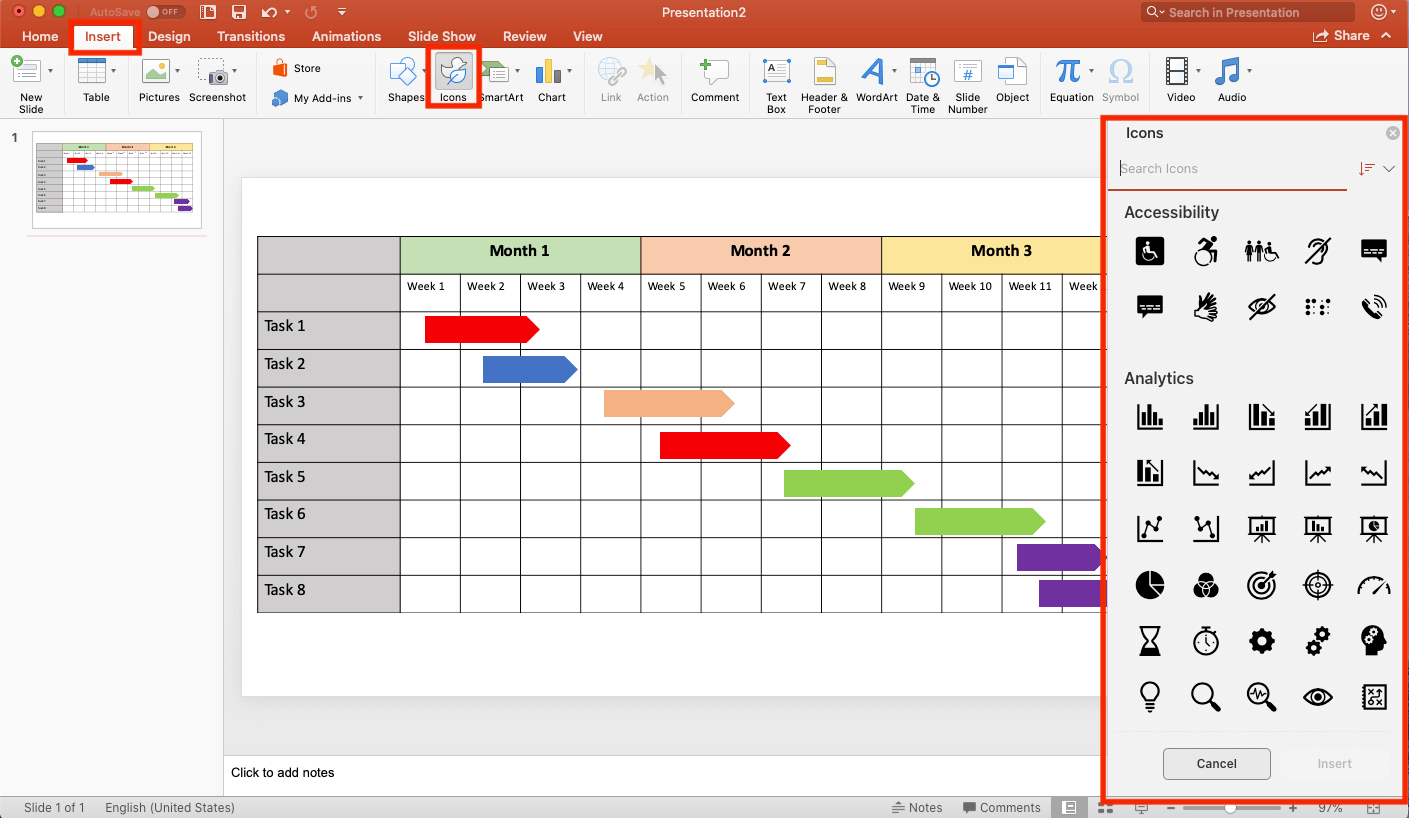
- TypeFlagin the search bar on the right panel.
- Click theFlagicon, and click theInsertbutton.
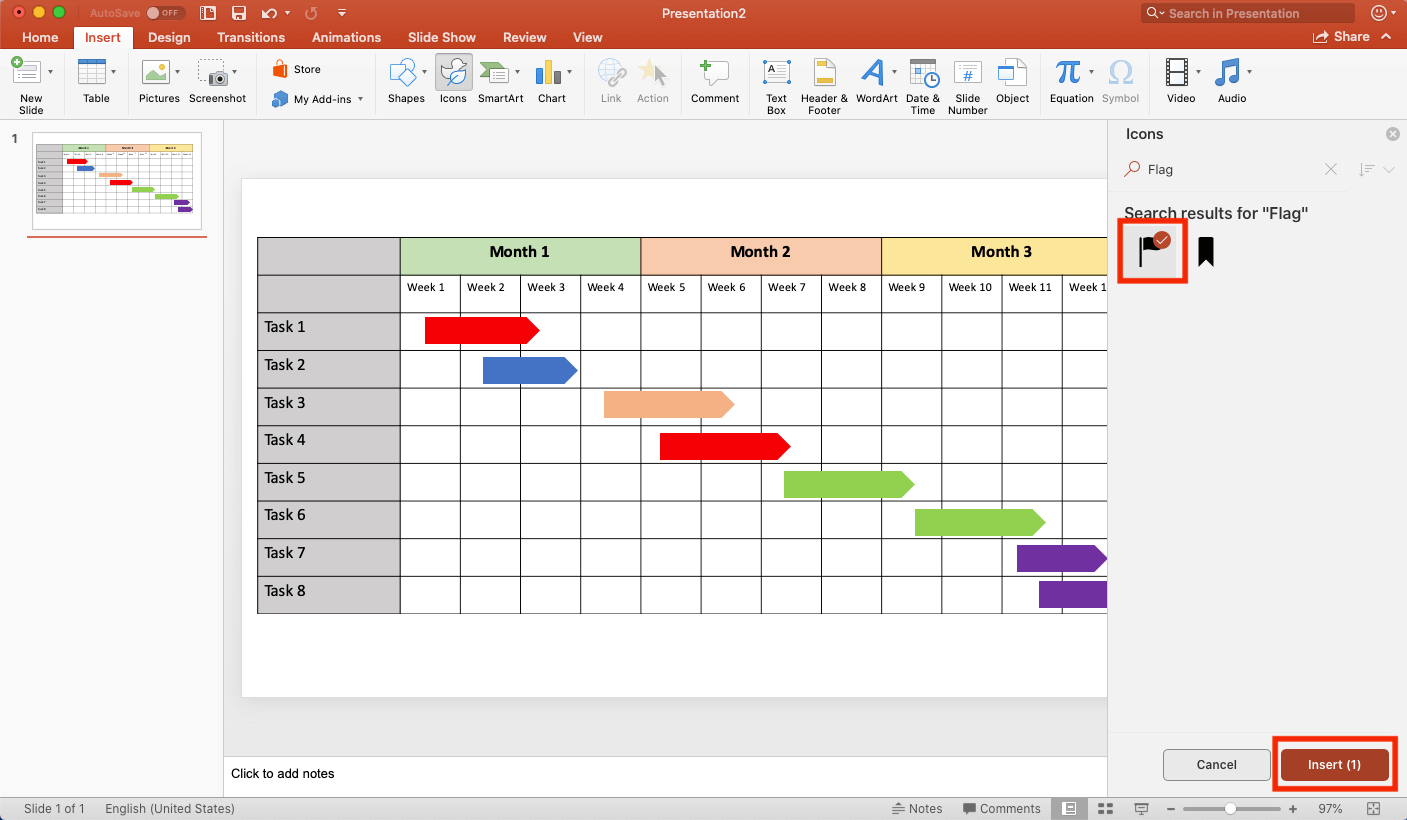
- Click on the icon and drag any of the four corners to reduce its size.
- Move theFlagto a place on the Gantt chart that signifies a milestone.

- Repeat these steps to add more milestones.
Pro Tip:Right-clicking on the icon, clickCopyand then clickPasteto make a duplicate version to use on the Gantt chart.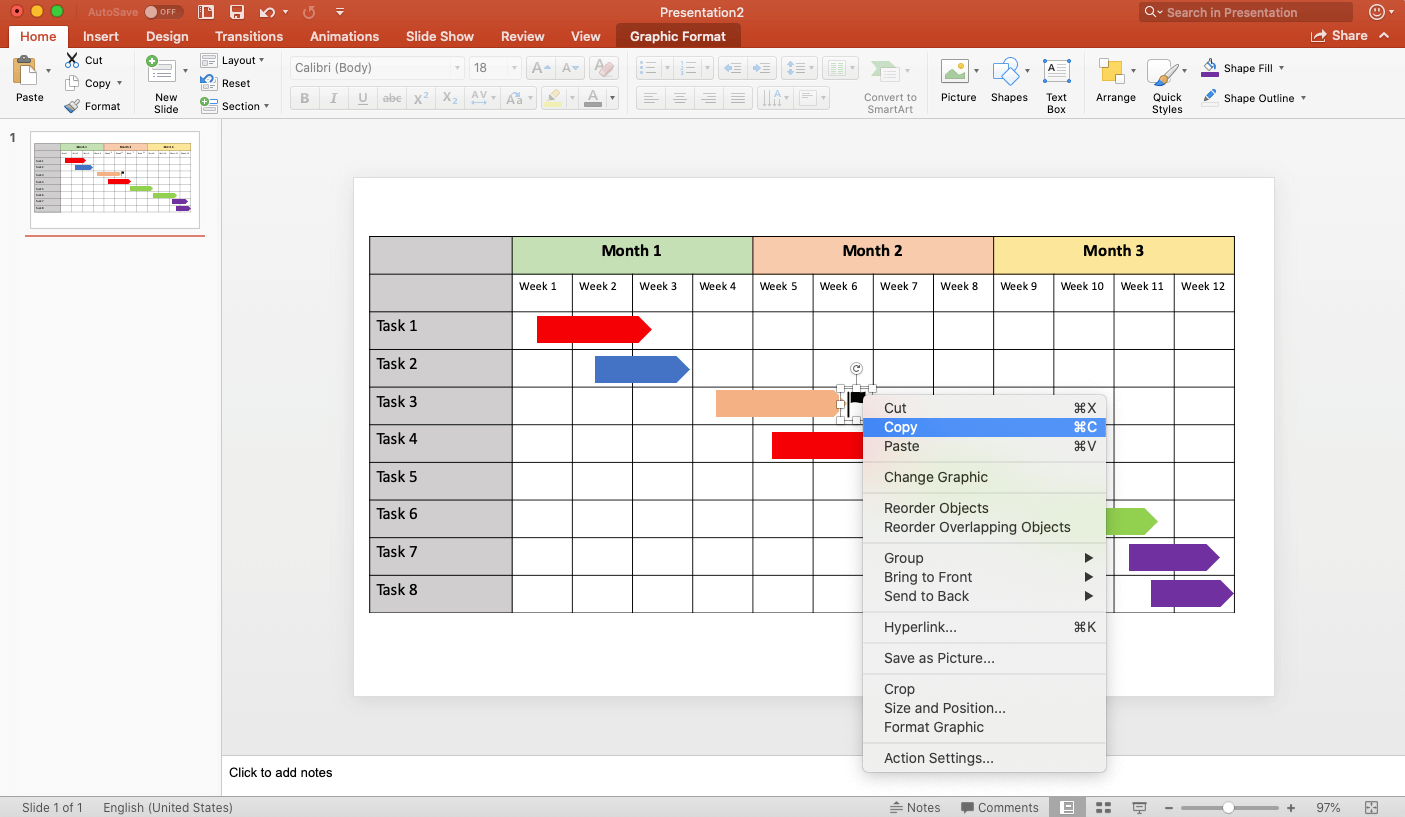
How to Make a Gantt Chart Using the Chart Function in PowerPoint
PowerPoint’s chart function allows you to add a specific chart or graph directly to a presentation. With this method, you can use a stacked bar chart to build a Gantt chart.
To make a Gantt chart in Microsoft PowerPoint, follow the step-by-step instructions below. These steps are compatible with all versions of PowerPoint.
Prepare a PowerPoint Presentation
- Open a new PowerPoint presentation.

- Click theLayoutdropdown menu on theHometab on the top navigation bar, and clickBlankto remove theTitleandSubtitletext areas.


Build a Stacked Bar Graphic in PowerPoint
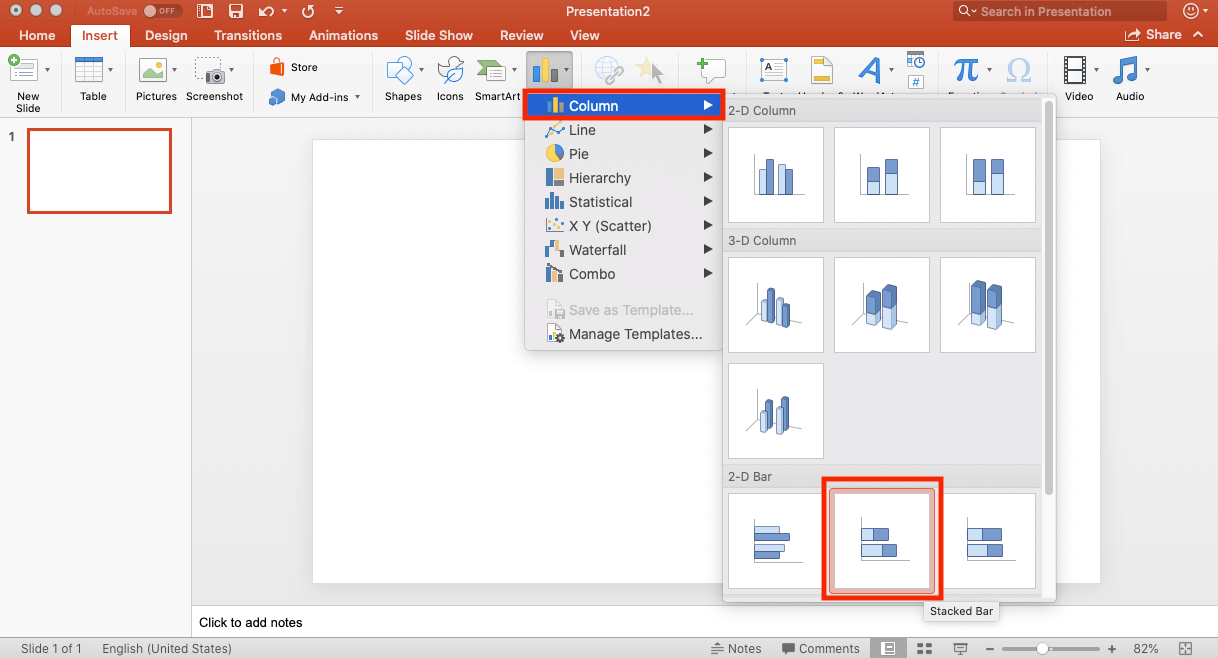
- Click theInserttab, and clickChart.
- Click theColumncategory, and clickStacked Barfor the type of graph. PowerPoint generates a standard bar chart graph automatically. The application will open a Microsoft Excel table.

Add Project Schedule Data to a PowerPoint Chart
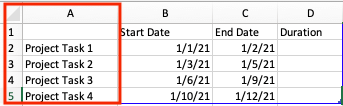
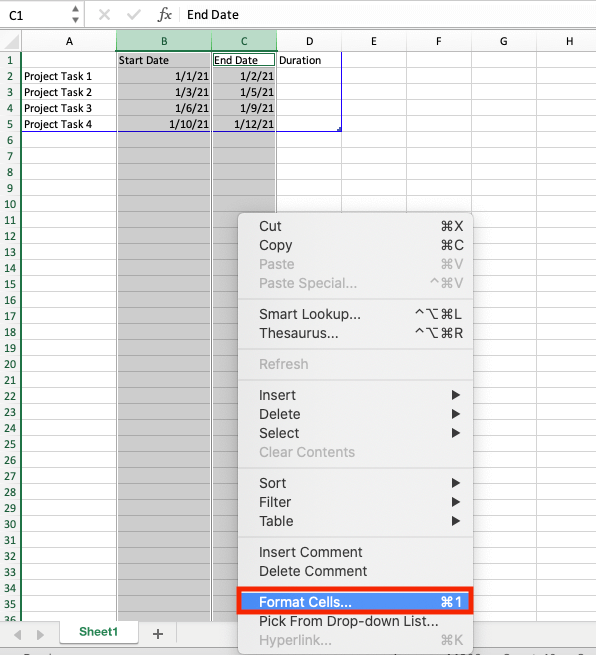
- Add project data to the corresponding Excel chart.
- List each project task name inColumn A.
- Rename the other pre-filled cells of the top row as follows:
- Series 1: Start Date
- Series 2: End Date
- Series 3: Duration

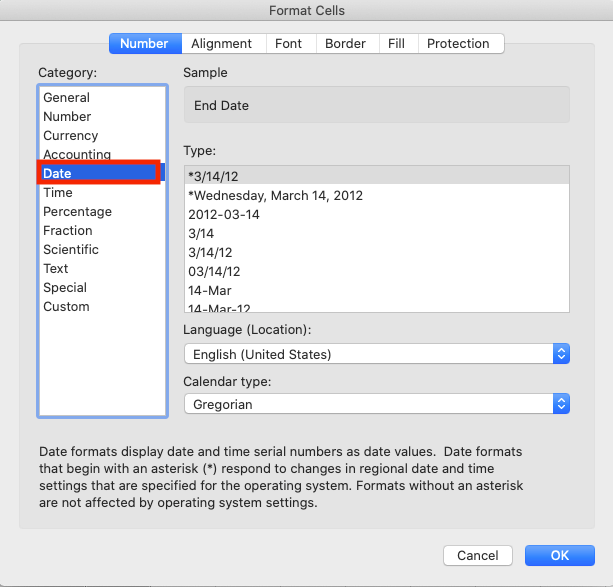
- Click cells B2-B5. Right-click on the highlighted cells, and clickFormat Cells. In theCategorylist on theNumberstab, clickDateand choose a format from theTypemenu.
- 在细胞D2,计算第一助教的持续时间sk by typing in the following formula:
=C2-$B2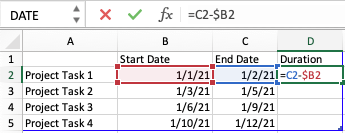
- Once you insert the formula into the cell, click the small box in the bottom-right corner of cell D2 and drag the fill handle downward acrosscolumn Duntil you reach the last task in the column.
- After you identify how long tasks will take, highlight theEnd Date列,单击右键,然后单击删除.


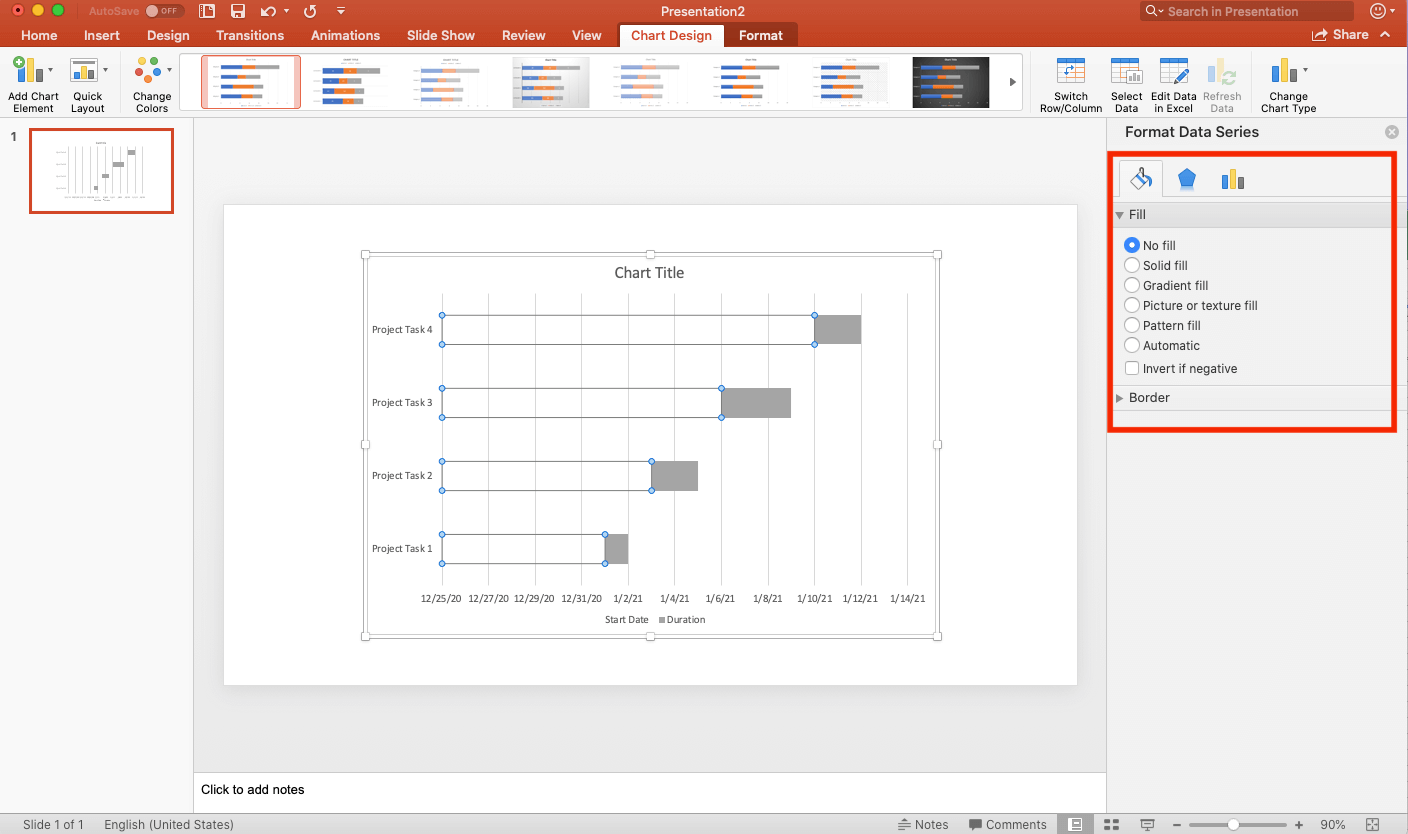
Turn a Stacked Bar Chart into a Gantt Chart
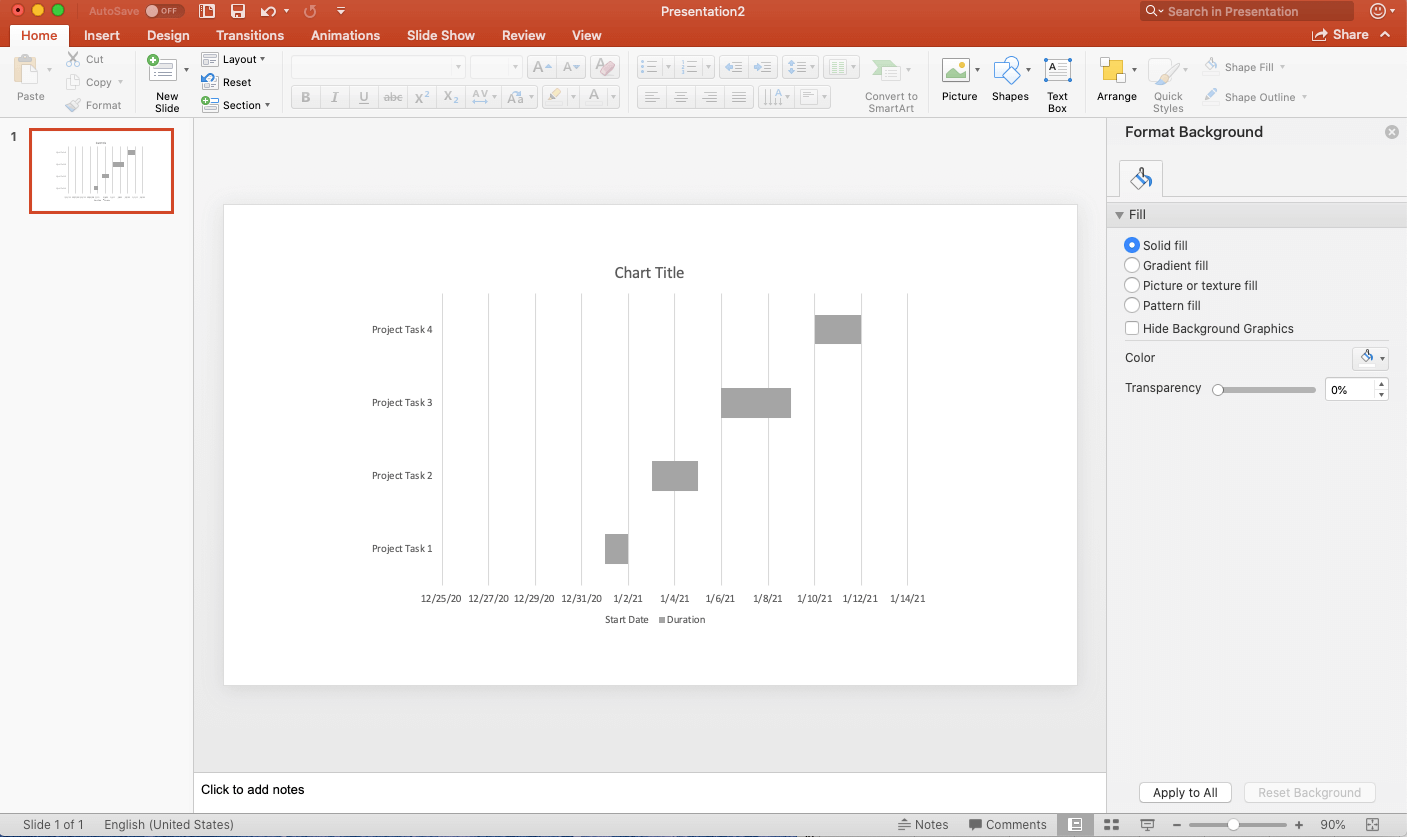
- Click a blue bar on the chart to select and highlight the whole series. The format menu will appear on the right panel.
- Click the paint bucket icon, click theFillbutton, and clickNo Fill.
- Once you unfill the series, that bar chart will resemble a Gantt chart.

Interested in creating a Gantt chart in Microsoft Excel instead of PowerPoint? Visitthis article for step-by-step instructions on how to build a Gantt chart in Excel.
How to Customize a Gantt Chart in PowerPoint
You might want to customize the Gantt chart you made with the chart feature. This way, you can more easily see vital tasks, track a project’s progress, or add branding colors. Follow the steps below to customize your Gantt chart.
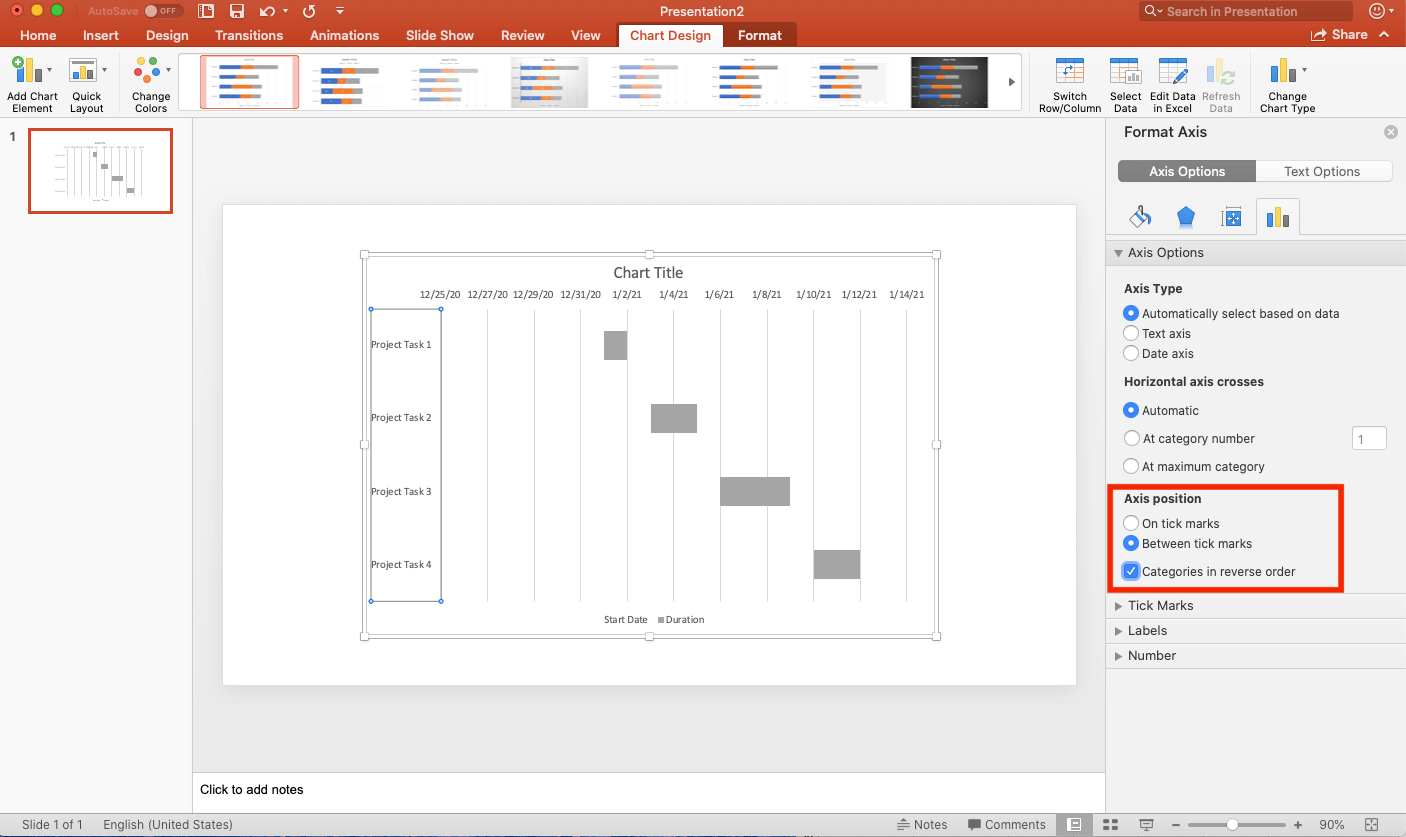
Reverse the Order of Task Bars on a Gantt Chart
- To reverse the order of your task bars, double-click on the task axis (the y axis).
- In theFormat Axismenu, click the bar tab and expand theAxis Optionsmenu. Click theCategories in Reverse Order盒子。

Customize the Task Bar Colors of the Chart
- Click a task bar in the Gantt chart. Click the paint bucket icon, and clickFill.
- Click your preferred color for the individual task.


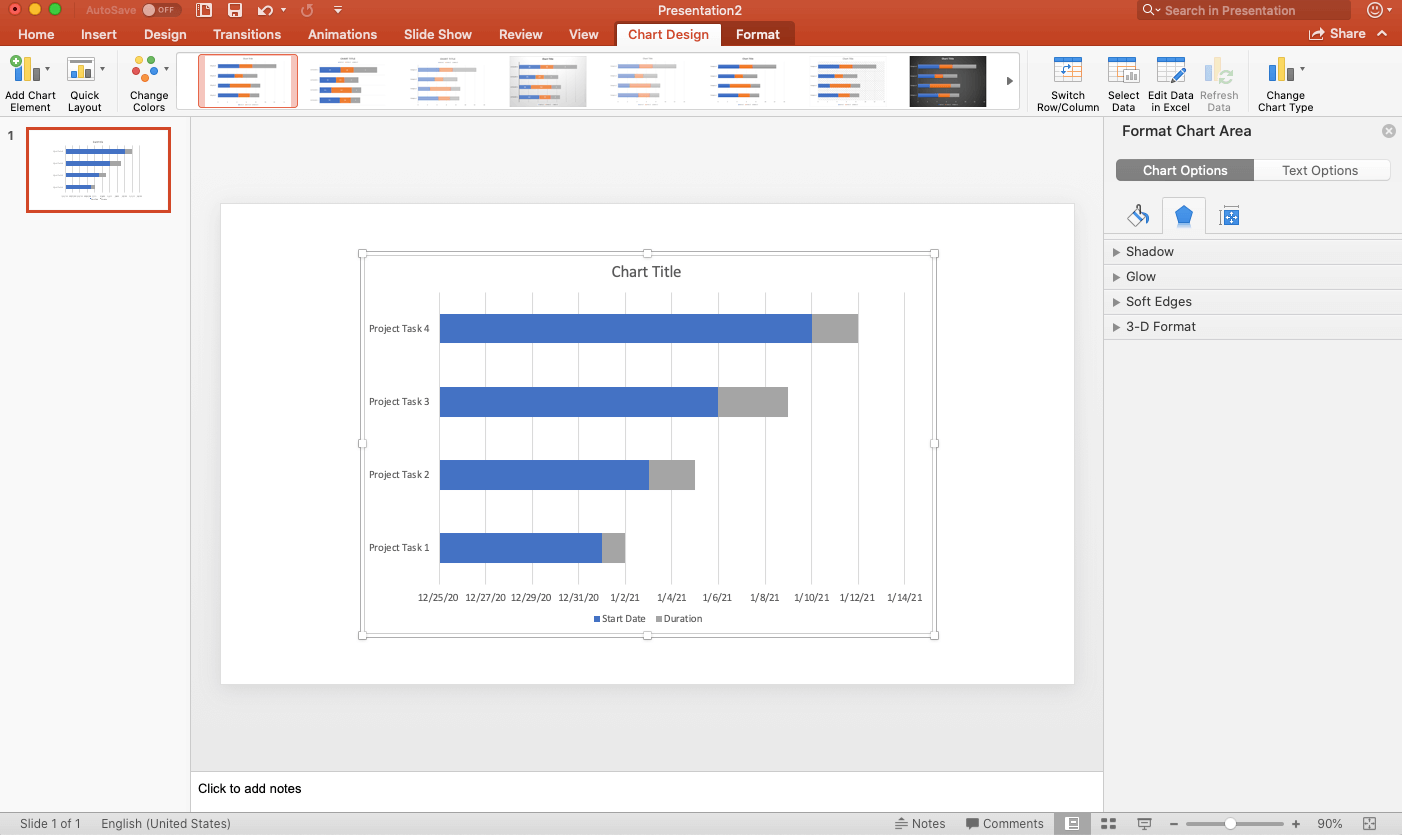
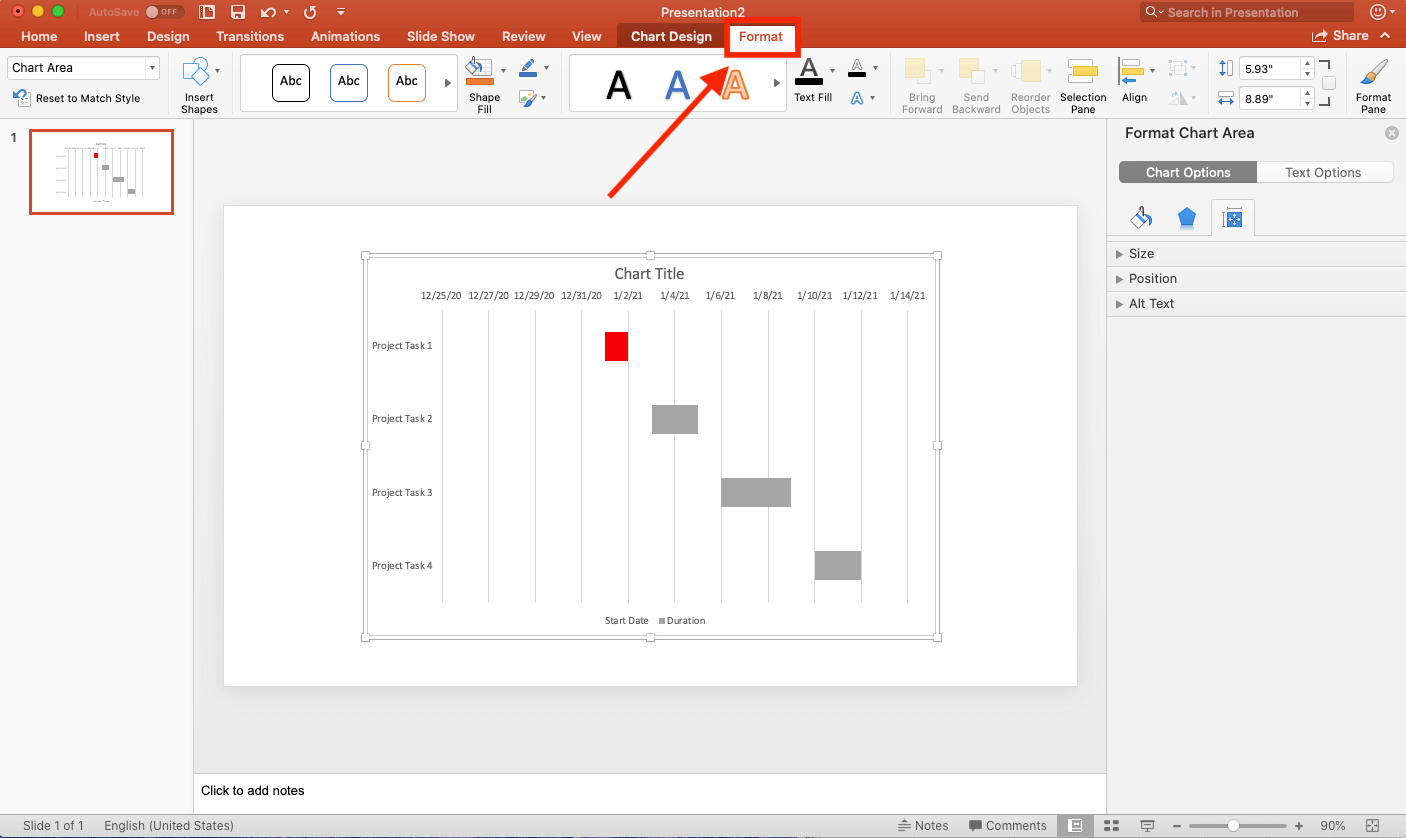
Add Customized Effects to Task Bars on the Gantt Chart
- 添加阴影等效果、发光和软ges to task bars, click theFormattab on the navigation bar.
- Use the available options to personalize the Gantt chart.

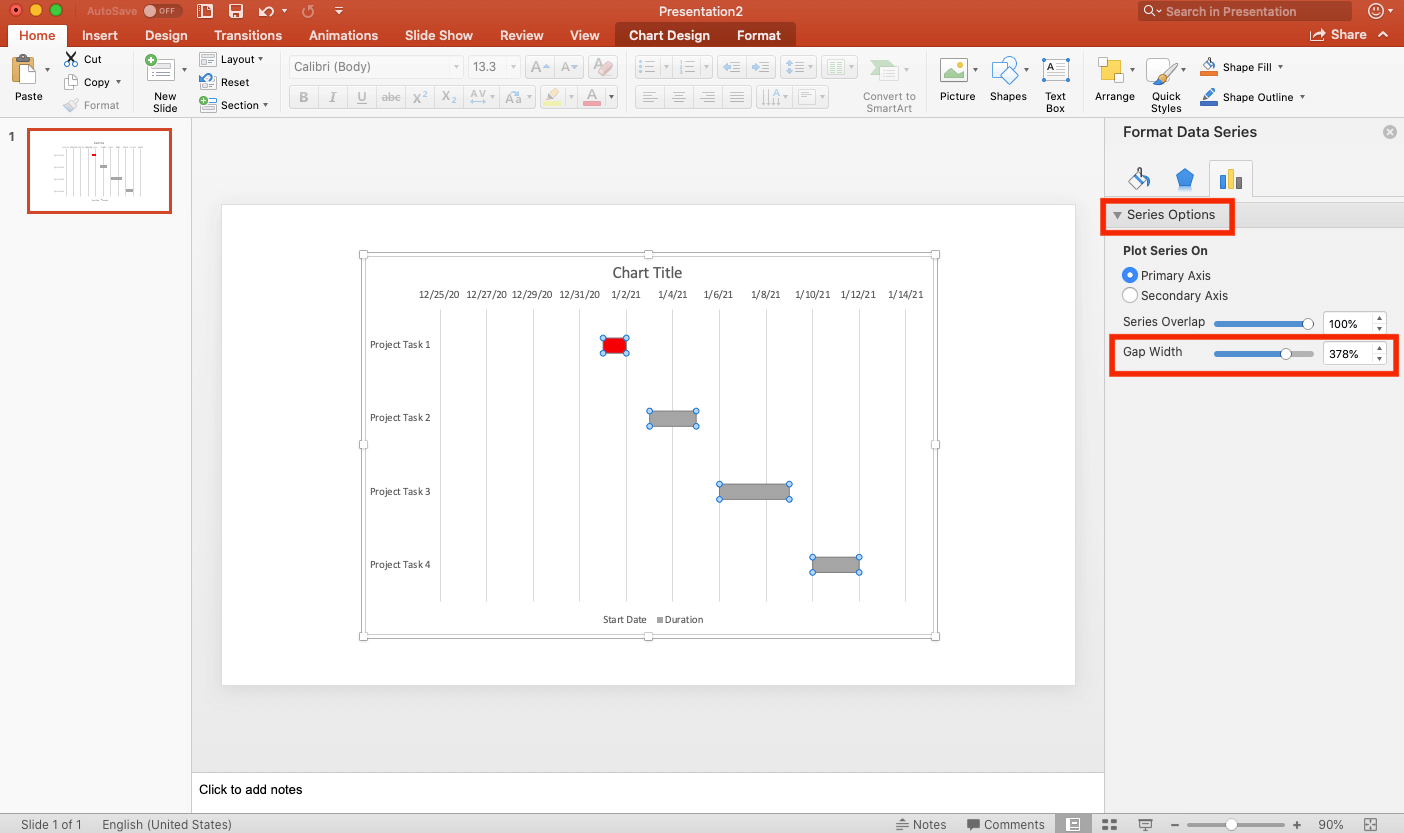
Reformat Task Bars on the Gantt Chart
- Double-click a task bar in the chart.
- Click theBar Charttab in theFormat Date Seriesmenu.
- In theSeries Optiontab, slide the dial to increase or decrease the width of the task bars.

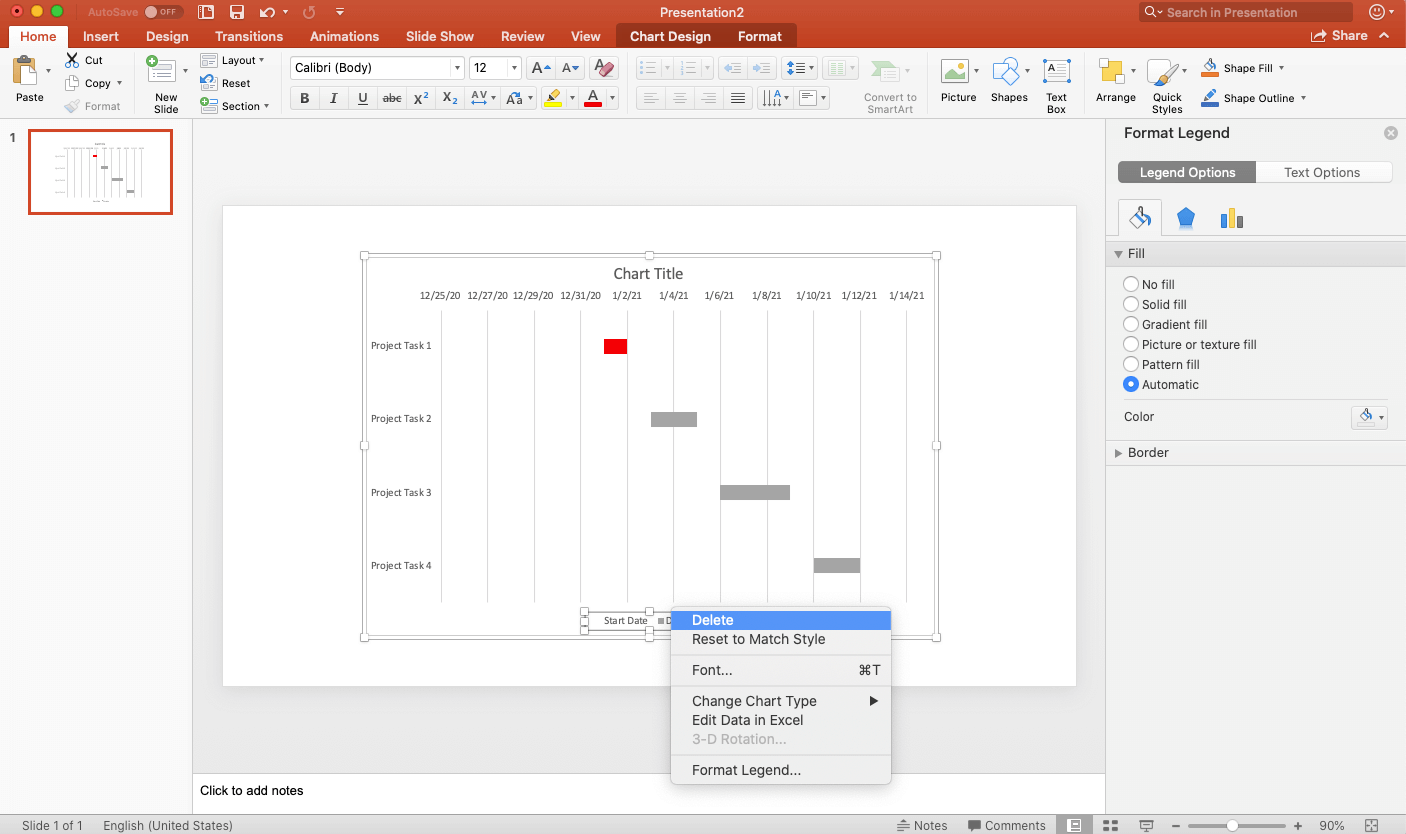
Remove the Legend from the Gantt Chart
- Right-click on the chart legend, and click删除.

Change Project Task Start and End Dates
As your project progresses, you might need to adjust start and end dates for some tasks to keep it running smoothly. Follow these steps below.
- Reopen the Excel data table that your Gantt chart is referencing in PowerPoint.
- Right-click on a bar in the chart, and clickEdit Data in Excel.
- Manually reenter new start and end dates for any project tasks. These changes automatically appear on the Gantt chart in PowerPoint.
Note: You’ll need to re-add theEnd Datescolumn in Excel, then remove it again once you make the updates.
How to Create a Gantt Chart Using a Template in PowerPoint
Instead of manually creating a Gantt chart using either the table or chart function, you can start with apre-built PowerPoint template.
A template helps you save time organizing project tasks, listing start and end dates, and formatting a chart so it resembles a typical Gantt chart.
- Open the Gantt chart template in PowerPoint.
- Go to the second slide of the presentation, which houses the Gantt chart.
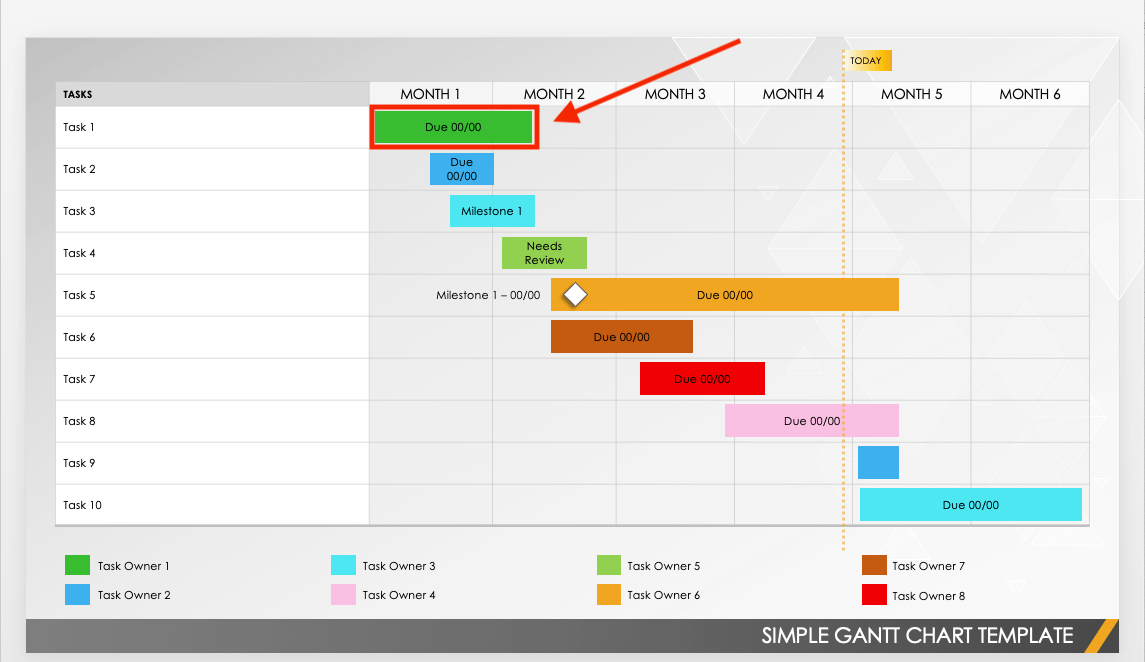
- Enter all project tasks in the first column.
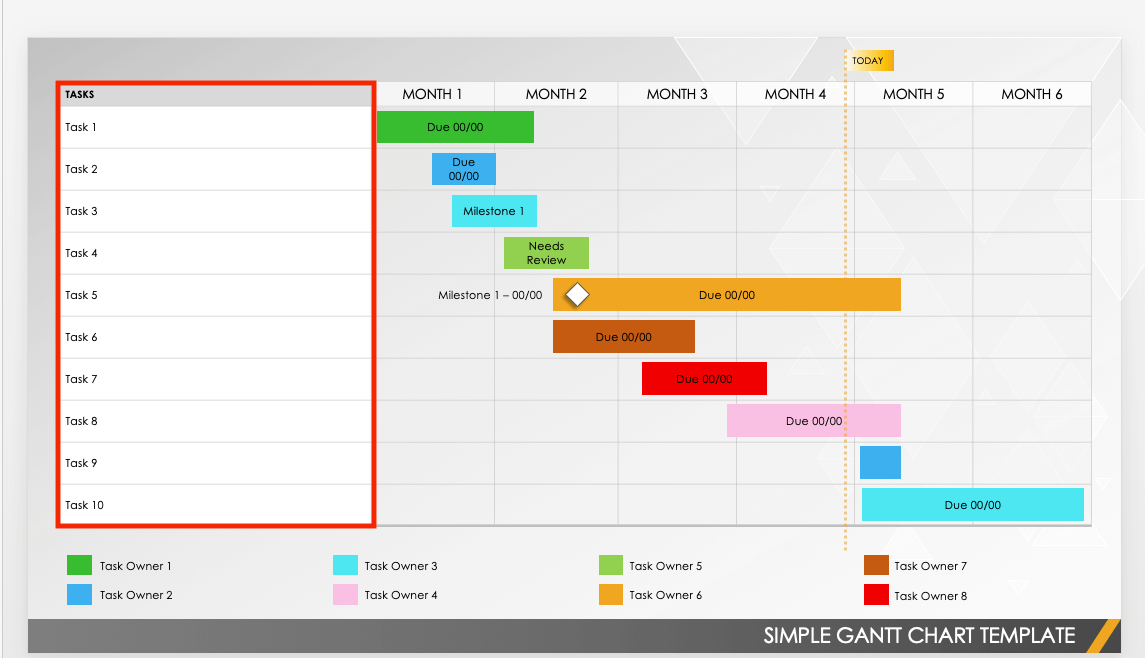
- Move task bars along the chart to show when each task should start and end.
- Increase and decrease the size of each task bar to show the total duration of each task.
- Assign task owners to each task using the key at the bottom of the template.
Pro Tip:You can change the colors of the task owner boxes to match up with the owner for each.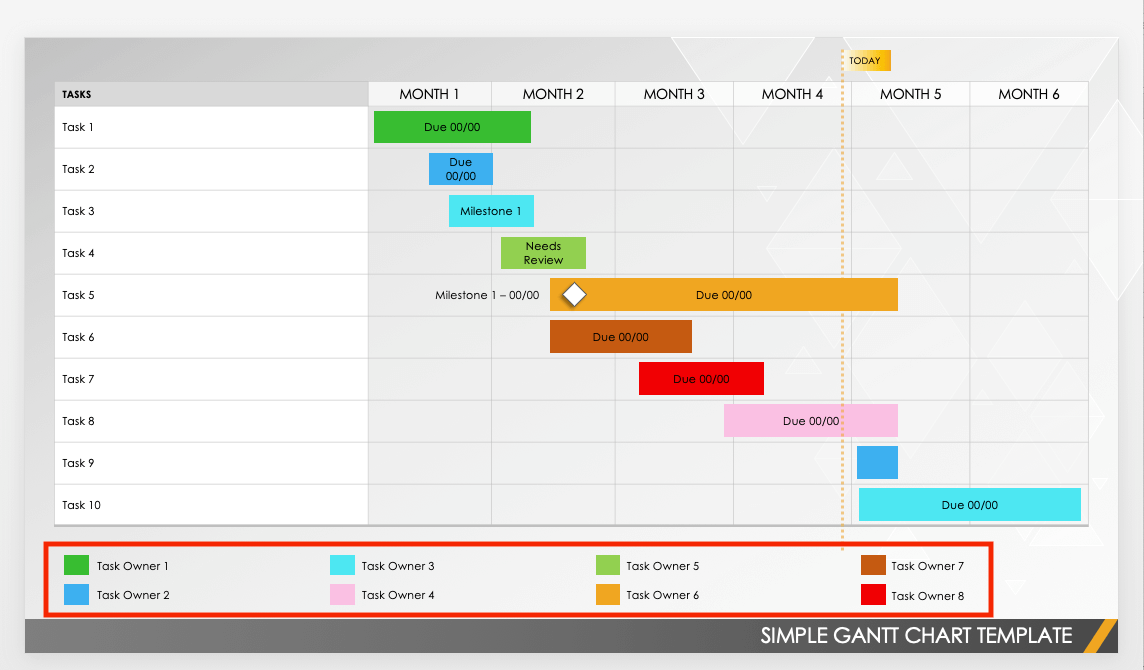
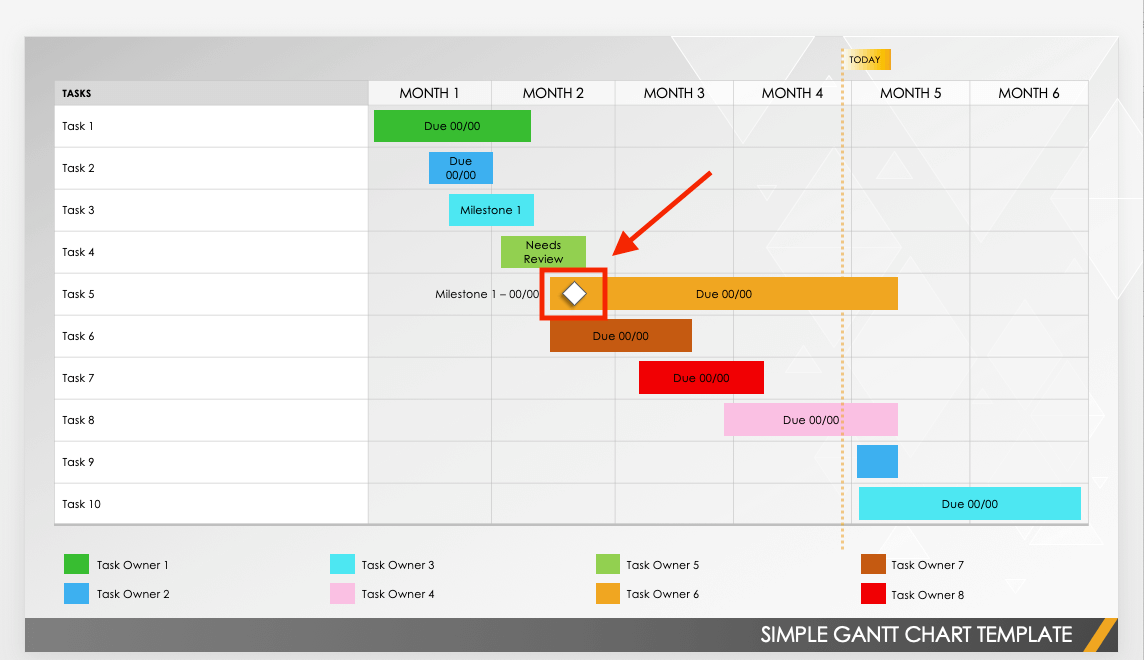
- Move the small white diamond shape (or copy and paste, or use a new shape) for each milestone your project requires.


Peruse our collection ofGantt chart templatesto find downloadable versions in other formats.
Gantt Chart Template in PowerPoint
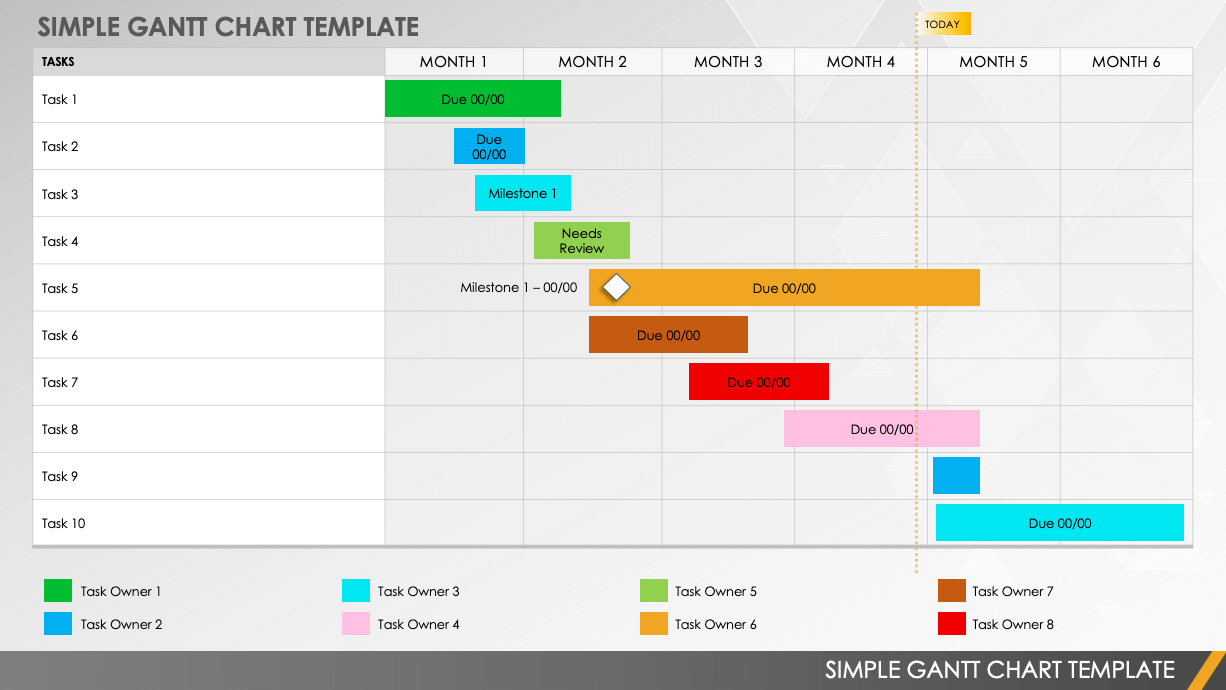
Use this helpful template to create a Gantt chart for your next project with Microsoft PowerPoint. This template offers an easy way to outline your project tasks, chart each task’s duration, assign tasks to team members, and track key milestones.
Download Gantt Chart Template
How to Import a Gantt Chart in Excel to PowerPoint
If you already created a Gantt chart in Microsoft Excel and want to feature it in a PowerPoint presentation, you can easily import it. Follow these steps.
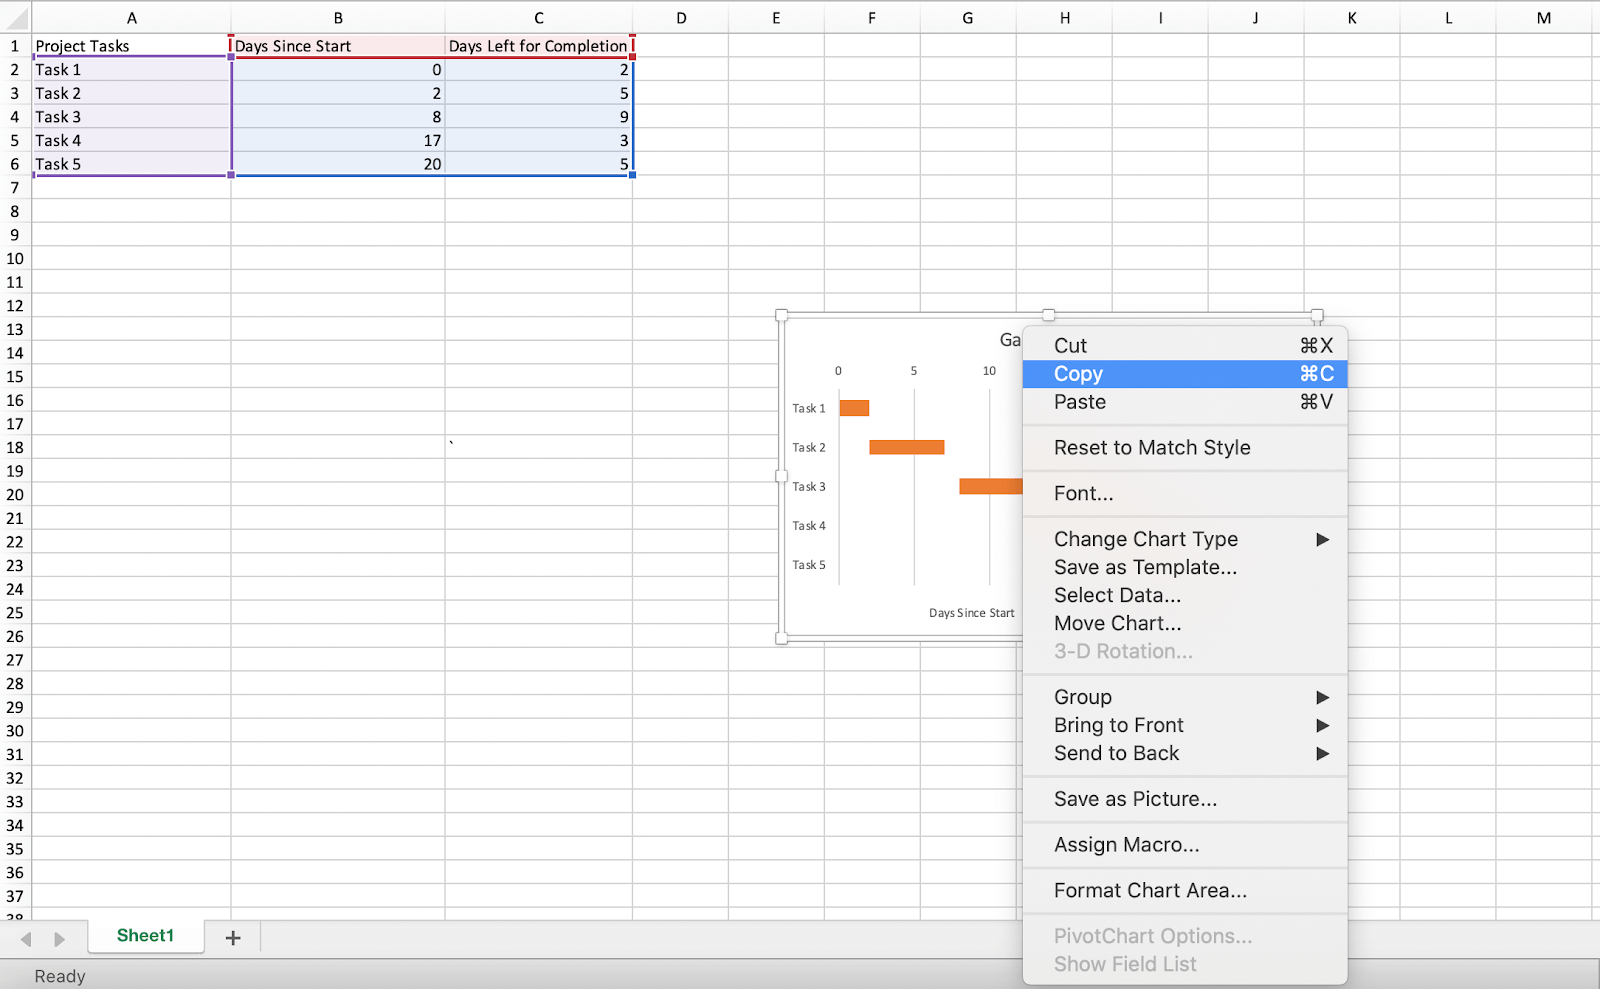
- Open the Gantt chart in Microsoft Excel.
- Highlight the entire chart and right-click. By doing so, you will also highlight the respective data table.
- ClickCopy.
- Navigate back to the PowerPoint presentation.
- Click the slide where you want to display the Gantt chart. Right-click anywhere on the slide, and clickPaste.
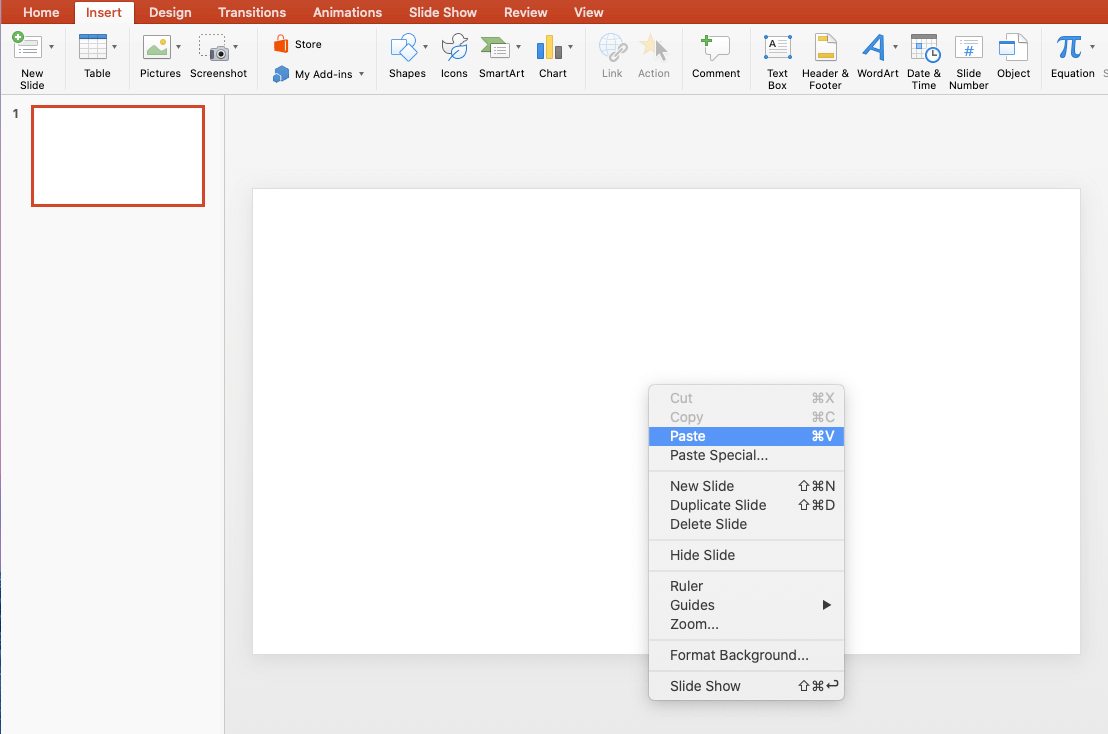
- The Gantt chart should paste directly into the slide.
Pro Tip:If you want to revise the dates in the Gantt chart at any point, you can do so in the Excel spreadsheet where you initially created it. The updates automatically appear wherever you use the Gantt chart, including the PowerPoint presentation.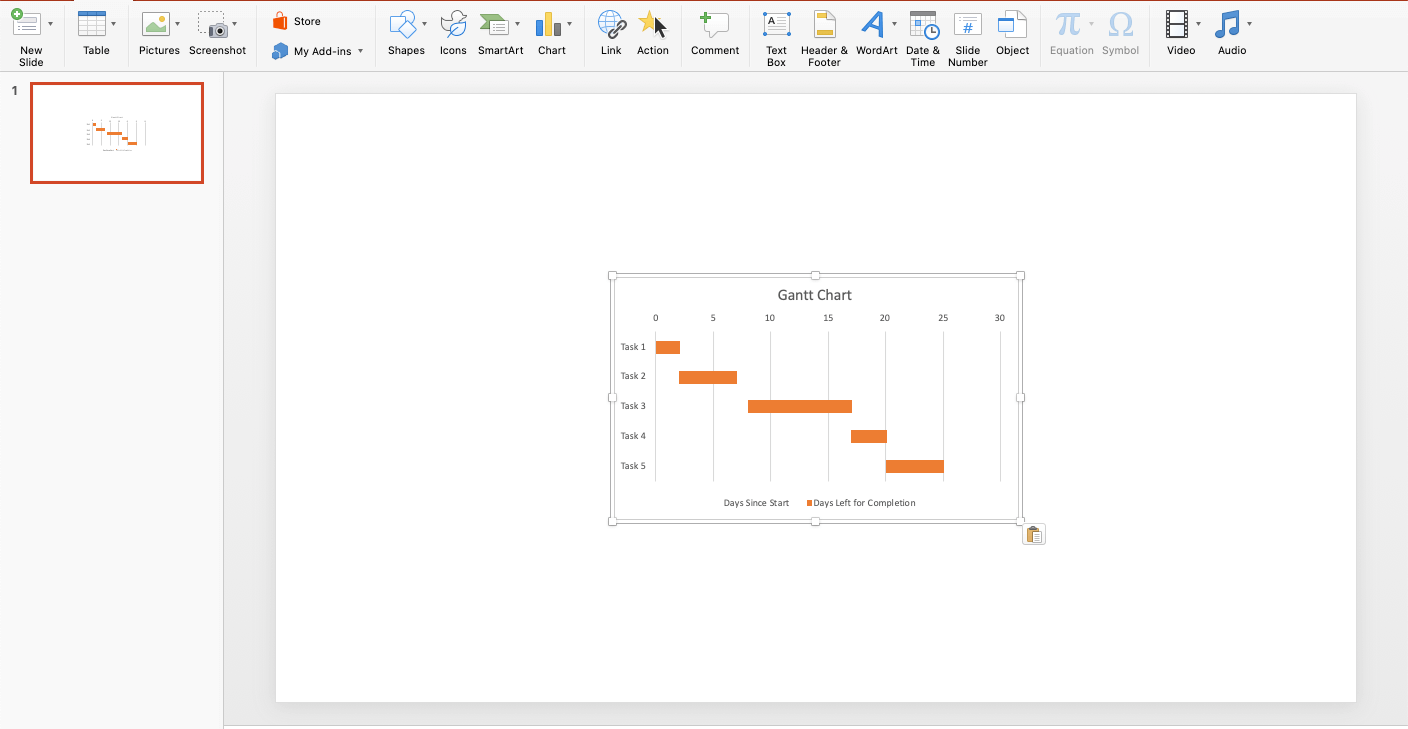


Looking for step-by-step instructions on how to create a Gantt chart in Excel?Visit this article for instructions, screenshots, and a helpful template.
How to Import a Gantt Chart from Google Sheets to PowerPoint
If you used Google Sheets to create a Gantt chart and want to import it to a new PowerPoint presentation, follow the steps below.
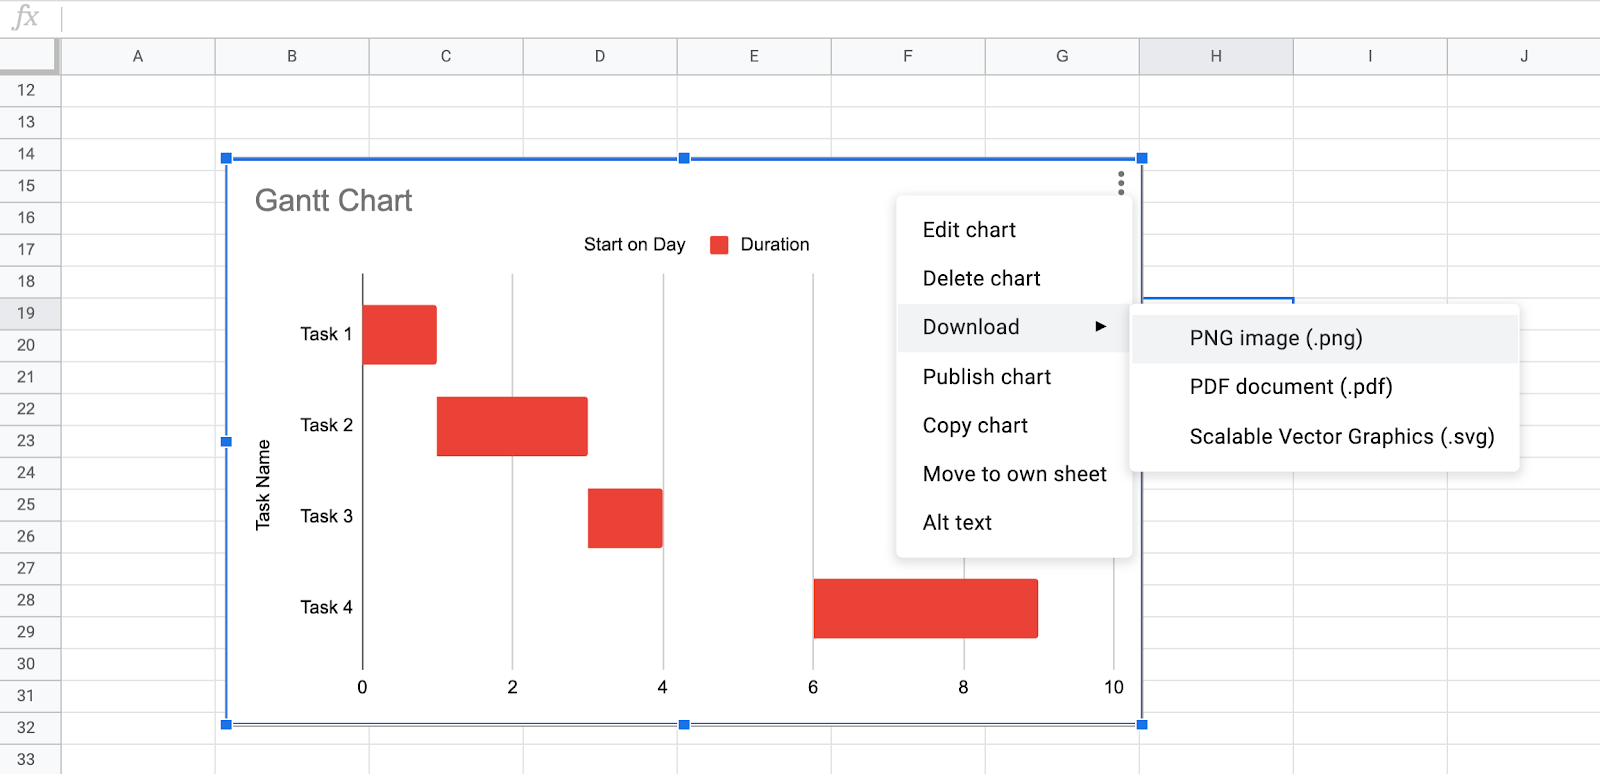
- Open the Gantt chart you created in Google Sheets.
- Click on the Gantt chart, and click the ellipses in the top-right corner of the chart.
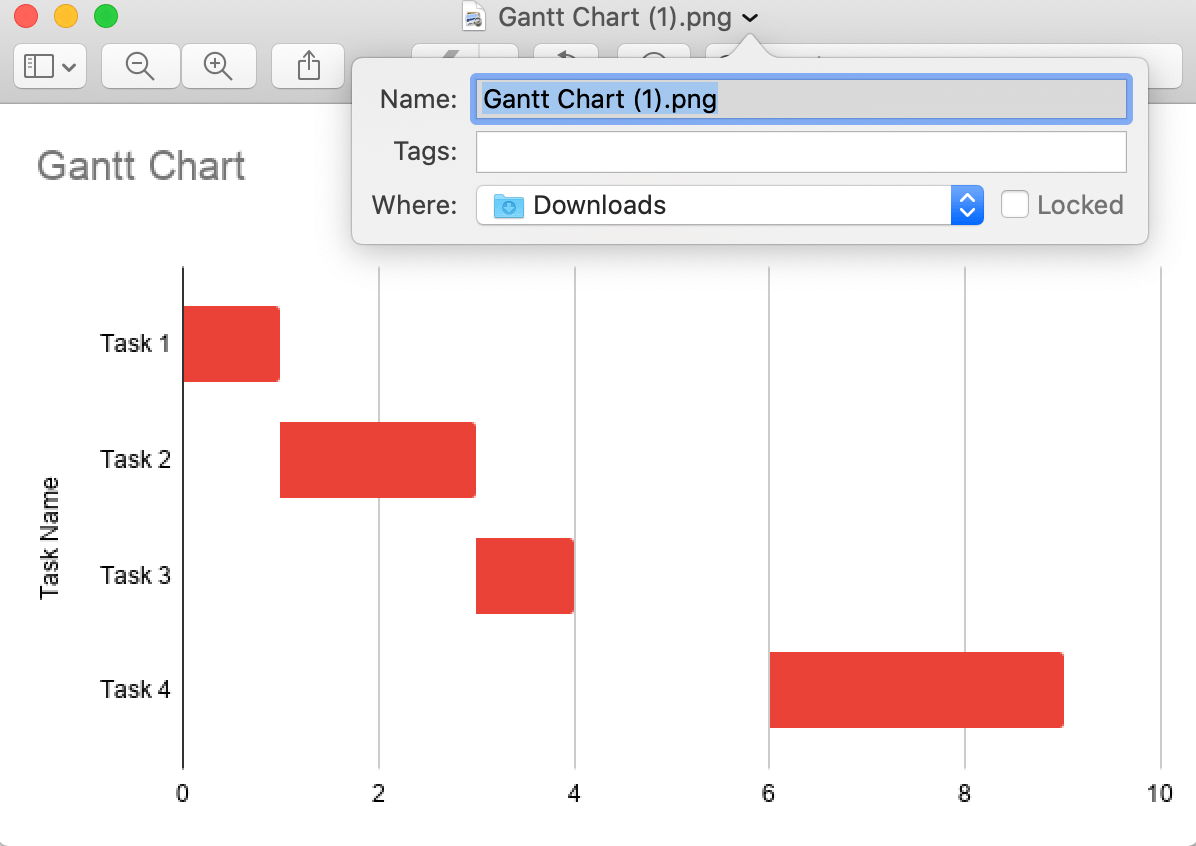
- ClickDownload, and thenPNG Image.
- Once the PNG image downloads, save it where it’s easy to access.
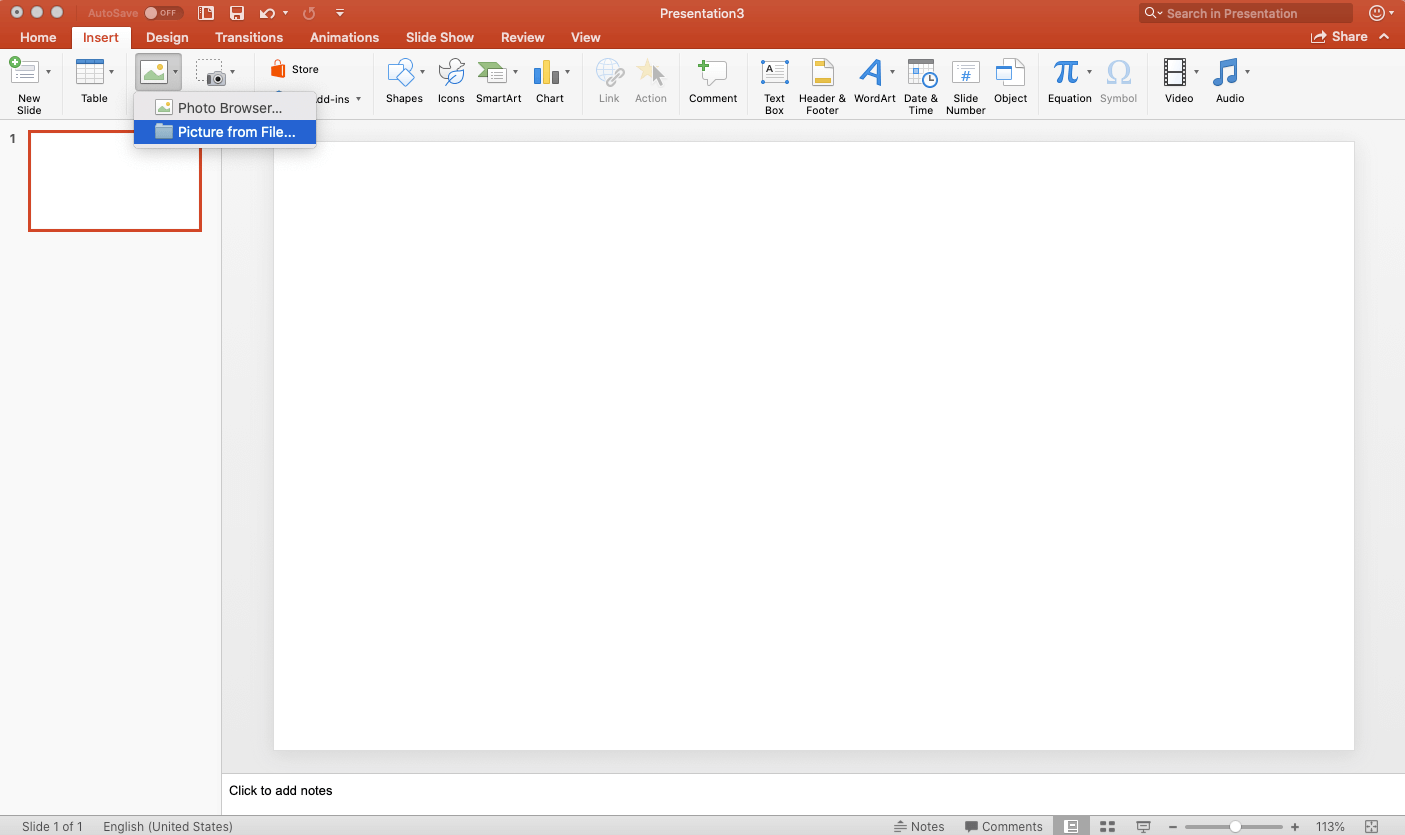
- Navigate back to the PowerPoint presentation and the slide where you want to add the Gantt chart.
- Click theInserttab, clickPicturesandPicture from File. Choose the downloaded PNG image of the Gantt chart.
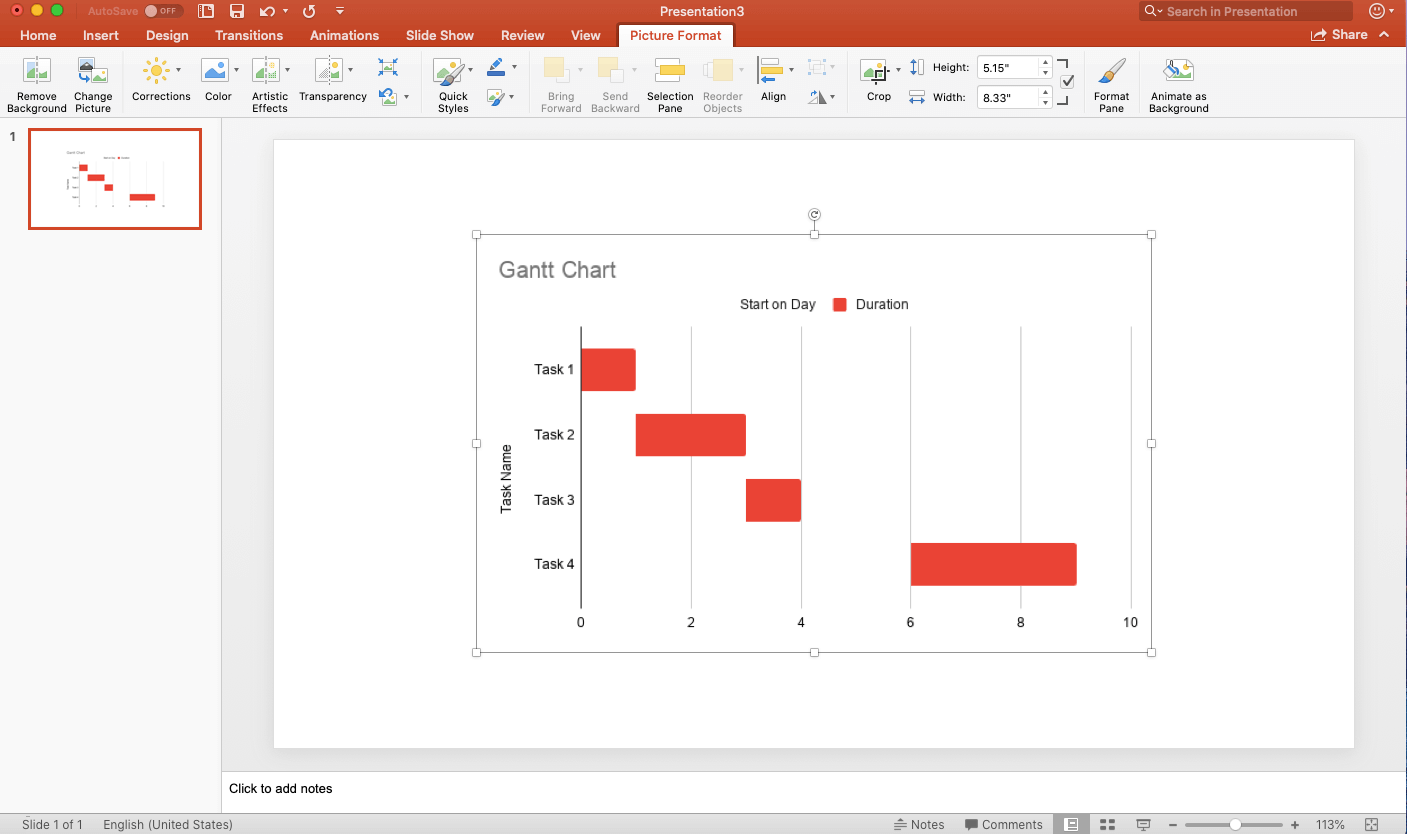
- 甘特图应该出现在力量Point presentation.


Want easy-to-follow instructions on how to create a Gantt chart in Google Sheets? Visit thisarticle for step-by-step instructionsand a downloadable template.
How to Import a Gantt Chart from Mac Numbers to PowerPoint
If you are a Mac user and already created your Gantt chart using Mac Numbers, you can easily import it to PowerPoint by following the steps below.
- Open your Gantt chart in Mac Numbers.
- Right-click on the chart, and clickCopy.
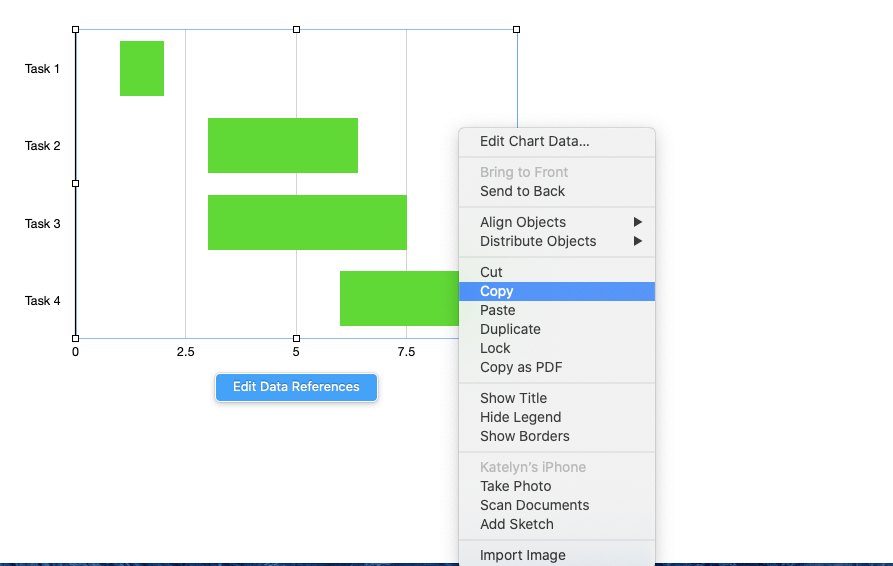
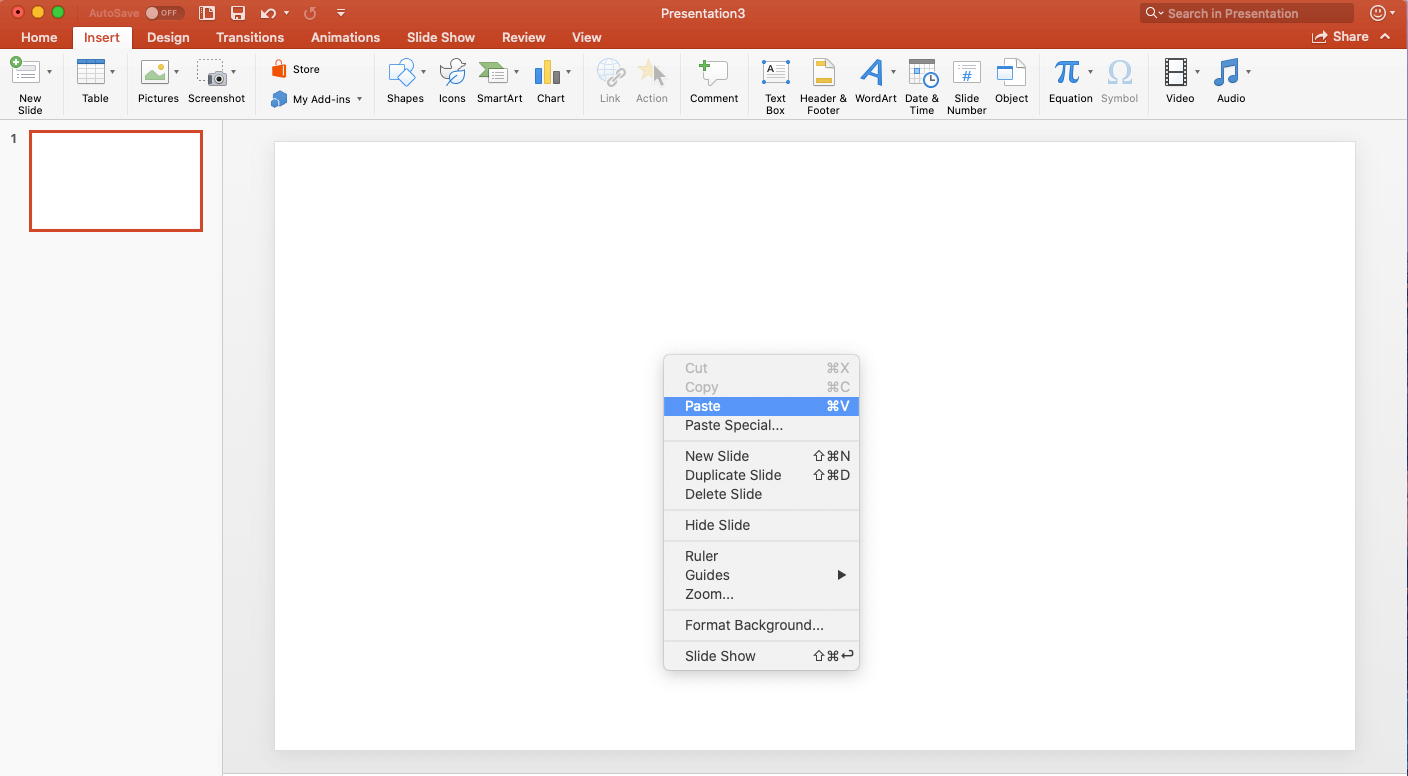
- Navigate back to the PowerPoint presentation, and select the slide where you want to add the Gantt chart.
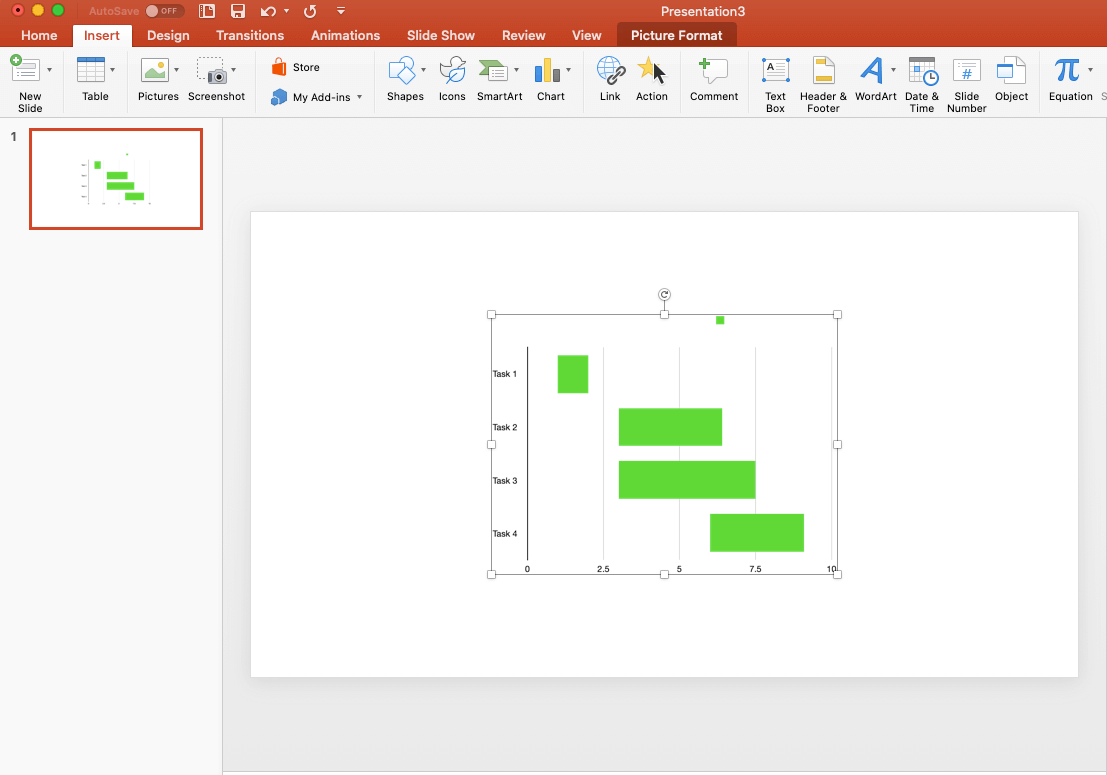
- Right-click anywhere in the slide, and clickPaste. The Mac Numbers Gantt chart will appear in the PowerPoint presentation.


Learnhow to create a complete Gantt chart in Mac Numbers. This tutorial teaches youhow to make a Gantt chart in Pages.
Get the Most Out of Your Gantt Charts with Smartsheet
From simple task management and project planning to complex resource and portfolio management, Smartsheet helps you improve collaboration and increase work velocity -- empowering you to get more done.
The Smartsheet platform makes it easy to plan, capture, manage, and report on work from anywhere, helping your team be more effective and get more done. Report on key metrics and get real-time visibility into work as it happens with roll-up reports, dashboards, and automated workflows built to keep your team connected and informed.
When teams have clarity into the work getting done, there’s no telling how much more they can accomplish in the same amount of time.Try Smartsheet for free, today.